Table of Contents
Introduction
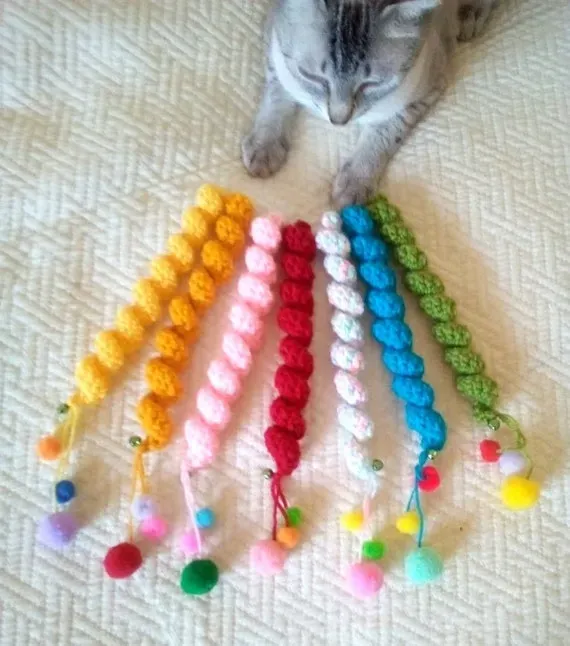
Ever watch your cat ignore that expensive toy you just bought, only to bat around a crumpled piece of paper or a stray hair tie? Yeah, been there. Cats are fickle creatures with very specific, often baffling, tastes in entertainment. Store-bought toys can be a gamble, and let's be honest, they rarely last long against determined claws and teeth. What if you could make a simple, inexpensive toy that your feline friend will actually adore? Something with movement, texture, and just the right amount of unpredictable jiggle? Enter thecrochet curly cat toy. It looks unassuming, maybe even a little silly to us, but to a cat, it's pure, unadulterated joy. Think about it: it wiggles, it's lightweight enough to toss around, and you can stuff it with catnip to make it irresistible. Plus, you made it yourself, which adds a certain level of smug satisfaction. This article will walk you through why these simple curly wonders are feline favorites, what you need to whip one up, a straightforward pattern to get you started, and how to customize it to make it your cat's absolute must-have. Get ready to become your cat's favorite toy supplier.
Why Your Cat Will Go Crazy for a Crochet Curly Cat Toy
Why Your Cat Will Go Crazy for a Crochet Curly Cat Toy
Tapping into the Inner Hunter
Look, cats aren't just cute fluffballs who sleep 20 hours a day. Underneath that serene exterior is a finely tuned predator, even if their prey is usually a dust bunny or your ankle. Acrochet curly cat toyis perfect because it mimics the unpredictable movement of small critters. It doesn't just roll in a straight line; it wiggles, it bounces erratically when batted, and those curls add a chaotic element that drives them nuts in the best way. It's not a predictable laser dot or a boring static mouse. It’s a challenge, a puzzle, a tiny, yarn-based adversary designed to satisfy that deep-seated urge to stalk, pounce, and kill (gently, of course). My own cat, Bartholomew, usually ignores anything that doesn't involve food or a sunbeam, but a new curly toy? Instant focus. His eyes get wide, his butt starts to wiggle, and then it's game on.
The Irresistible Texture and Movement
Part of the appeal of acrochet curly cat toyis the sensory experience. The textured yarn feels interesting under their paws and in their mouths. It’s not smooth plastic or hard rubber. It’s soft, yet durable enough for them to sink their claws into a little without immediately shredding it (though they'll definitely try over time). The "curly" part isn't just for looks; it creates a springy, dynamic movement. When they bat it, it doesn't just slide; it bounces back, it twists, it does a little jig. This unpredictable motion keeps them engaged far longer than a simple ball. It’s like a tiny, yarn-based Slinky that fights back. Here's what makes them different:
- Unpredictable bounce and wiggle
- Engaging texture for paws and teeth
- Lightweight and easy to carry
- Can be infused with catnip
DIY Love and Catnip Power
One of the best things about acrochet curly cat toyis that you can make it yourself. This means you control the materials (hello, natural fibers!) and, crucially, you can add the good stuff. Fresh catnip tucked inside before you close it up turns a simple yarn curl into a feline narcotic. Seriously, I've seen cats who are usually aloof turn into purring, drooling messes over a catnip-stuffed curly toy. Making it yourself also feels pretty good. It's a small act of love for your pet, and seeing them genuinely enjoy something you created? That's a win. It beats dropping five bucks on a toy they'll sniff once and ignore forever.
Gathering Your Yarn and Tools for a Crochet Curly Cat Toy
Gathering Your Yarn and Tools for a Crochet Curly Cat Toy
Choosing the Right Yarn (Without Making a Yarn Salad)
first things first: the yarn. You're making a toy that your cat is going to chew, claw, and likely try to ingest small pieces of, so yarn choice matters. Skip anything super fuzzy or novelty yarn with bits that can easily pull off – we don't want any accidental yarn salads ending up in the vet's office. Stick to simple, durable fibers. Acrylic is a solid, budget-friendly choice. It's tough and comes in every color imaginable. Cotton is also good, often a bit sturdier, but can be less stretchy. Wool is an option, but some cats are allergic, and it can felt up when wet (like from enthusiastic drool). The key is a plain, worsted weight (that's medium thickness) yarn. It's easy to work with and holds its shape well for that essential curly bounce in yourcrochet curly cat toy.
Hook, Scissors, and the Bare Necessities
Besides yarn, you don't need a fancy setup. A crochet hook is obviously non-negotiable. For worsted weight yarn, a G-6 (4.0mm) or H-8 (5.0mm) hook usually works well. The exact size isn't critical; you just want a fabric that's tight enough so stuffing (if you use any) doesn't poke through, but not so tight it's impossible to work. You'll also need a pair of scissors for cutting yarn. A yarn needle (a blunt, large-eyed needle) is super helpful for weaving in ends cleanly, which is important so your cat doesn't pull the toy apart instantly. That's really it for the basics. See? No need to mortgage your house for supplies. Here are the essentials:
- Worsted weight yarn (acrylic or cotton recommended)
- Crochet hook (G-6 or H-8)
- Scissors
- Yarn needle
Optional Upgrades: Catnip, Crinkle, and Jingle
Now, if you want to take yourcrochet curly cat toyfrom "pretty good" to "absolute feline obsession," consider some extras. Catnip is the classic choice. You can buy dried catnip and stuff a little pouch of it inside the toy before closing it up. Or, you can get catnip spray and mist the finished toy. Another popular addition is something that makes noise. A small jingle bell securely sewn inside can add an auditory element cats love. Just make absolutely sure it's sewn in tight so it can't come loose. Some people also add crinkle material – a small piece of cellophane or crinkle paper sewn inside can mimic the sound of rustling prey. Just remember to keep any additions small and very secure. The goal is enrichment, not emergency surgery.
Your First Crochet Curly Cat Toy: A Simple Pattern Walkthrough
Your First Crochet Curly Cat Toy: A Simple Pattern Walkthrough
Getting Started: The Foundation Chain
deep breaths. If you've never crocheted before, this is your low-stakes entry point. This isn't some intricate doily or a complicated amigurumi creature with tiny limbs. We're making a simple strip that curls. The magic happens with the stitches themselves. To start yourcrochet curly cat toy, you'll make a foundation chain. This is just a series of slip knots pulled through each other. The length of this chain determines how long your finished curly toy will be. Want a little worm? Chain about 20-30 stitches. Want a long, snake-like curl? Go for 50 or more. Don't stress about perfection here. Just get those chains lined up.
Making the Magic Happen: Packing Stitches into Each Chain
Here's where the "curly" part of thecrochet curly cat toycomes in. Instead of putting just one stitch (like a single crochet or double crochet) into each chain stitch across, you're going to pack multiple stitches into each one. The most common way to get a tight curl is to put several double crochet (dc) stitches into every single chain stitch. If you put three or four dc stitches into each chain, the fabric starts to ruffle and spiral naturally because there's too much stitch for the available space. It's counterintuitive if you're used to making flat fabric, but that's exactly what we want here. Work your way down the entire foundation chain, putting 3-4 double crochets in *each* chain stitch. You'll see it start to twist almost immediately. Here's a quick cheat sheet for the curl:
- Start with a chain (length = desired toy length).
- Into the *second* chain from the hook (or third, depending on preference), work 3-4 double crochet (dc) stitches.
- Repeat: 3-4 dc stitches into *every* remaining chain stitch down the row.
- Watch it curl!
Finishing Up: Weaving Ends and Adding the Zing
Once you've worked your way to the end of the foundation chain, you'll have a long, gloriously curled piece of crochet fabric. Cut your yarn, leaving a tail about six inches long. Pull this tail through the loop on your hook to fasten off. Now comes the crucial part for any cat toy: securing those ends. Use your yarn needle to weave the yarn tails back and forth through the stitches of the toy several times. You want these ends buried deep and secure. A cat's mission in life is often to find and destroy loose ends, and you don't want them ingesting yarn. If you're adding catnip or a bell, now is the time to tuck it into one end and use the yarn tail to cinch it closed before weaving in that final end. Give it a little shake, maybe a test wiggle. Congratulations, you just made acrochet curly cat toy. Now, brace yourself for feline approval (or utter indifference, but probably approval).
Making Your Crochet Curly Cat Toy the Ultimate Feline Obsession
Making Your Crochet Curly Cat Toy the Ultimate Feline Obsession
Infusing Your Creation with Irresistible Scents
you've crocheted the curly thing. Now how do you make it *the* thing your cat can't ignore? The quickest route to feline infatuation is scent. Cats live through their noses, and while your lovely yarn might smell vaguely like your hands (which they tolerate), a strategic scent boost is key. Fresh catnip is the gold standard. You can buy dried leaves or buds and carefully stuff a small amount inside the toy before you sew it completely shut. A tiny fabric pouch or even just tucking it into the final stitches works. Another method is using catnip spray on the finishedcrochet curly cat toy. A few spritzes, let it dry, and suddenly that yarn worm is the most fascinating object in the room. Some cats are more sensitive to valerian root or silvervine if catnip doesn't do the trick. Experiment a little. Just ensure whatever you add is non-toxic and securely contained within the toy.
Presentation and Play Techniques
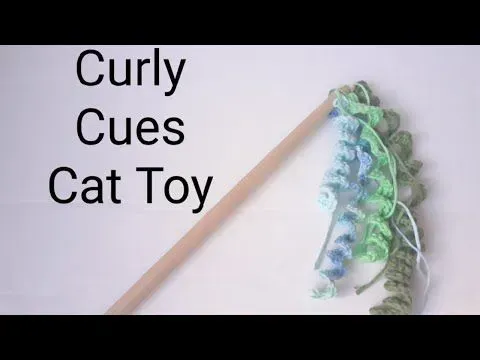
Making thecrochet curly cat toyis only half the battle; how you introduce it matters. Don't just toss it on the floor and expect miracles. Mimic prey behavior. Wiggle it slowly under a blanket, then let a curl peek out. Drag it along the floor in short, erratic bursts. Flick it gently so it bounces off a wall. The unpredictable movement you built into the toy with those extra stitches comes alive when you manipulate it. Play with your cat using the toy for a few minutes each day. This interaction strengthens your bond and teaches your cat that this particular curly object is a source of fun and engagement. Leaving a few catnip-infused curly toys lying around for solo play is also a good strategy, but interactive play is what truly elevates the status of the humblecrochet curly cat toyfrom 'just another toy' to 'ultimate obsession'. What makes a toy truly irresistible?
- Enticing scent (catnip, valerian, silvervine)
- Unpredictable motion
- Interactive play sessions
- Novelty (rotate toys!)
Beyond the Basic Crochet Curly Cat Toy: Variations and Ideas
Beyond the Basic Crochet Curly Cat Toy: Variations and Ideas
Playing with Length and Curl Density
So you've mastered the basic wiggle worm. Great. Now, cats are individuals, much like us, except they don't pay rent. What one cat considers peak entertainment, another might eye with suspicion before walking away to lick their butt. This is where variation comes in. You can change the length of yourcrochet curly cat toyjust by making your starting chain longer or shorter. Simple enough. But the real fun is playing with the curl density. Remember how you packed 3-4 double crochets into each chain? Try putting 5 or 6. You'll get a much tighter, springier curl that might bounce differently. Or, use only 2 stitches per chain for a looser, wavier effect. Different cats respond to different movements and textures. My neighbor's cat, Mittens, is obsessed with the super-tight, bouncy curls, while Bartholomew prefers a longer, lazier wiggle. It's all about experimentation. Here are a few ways to mix it up:
- More stitches per chain = Tighter, bouncier curl
- Fewer stitches per chain = Looser, wavier curl
- Longer starting chain = Longer toy
- Thicker yarn = Chunkier toy
- Thinner yarn = Daintier toy
Adding Bells, Tails, and Multi-Colored Mayhem
Once you're comfortable with the basic curl, you can start adding bells and whistles – sometimes literally. Adding a small, securely enclosed jingle bell inside one end before you close it up provides an auditory stimulus that many cats find irresistible. Just triple-check that bell is going nowhere. You can also add a simple tail by just crocheting a short chain at one end of the curl and fastening it off securely. Or, get fancy and make several shorter curls and join them together in the center to create a multi-legged creature that flops around in weird and wonderful ways. Don't forget color! Use up yarn scraps to make striped curly toys, or switch colors mid-row for a speckled effect. A bright, multi-coloredcrochet curly cat toymight just catch your cat's eye better than a plain one. The possibilities are pretty endless, limited mostly by your yarn stash and your cat's discerning (and often baffling) preferences.
Your Cat's New Favorite Toy Awaits
So there you have it. Crafting acrochet curly cat toyisn't rocket science. It's a simple, rewarding project that can save you money and, more importantly, provide hours of entertainment for your furry companion. You've seen why cats love the wiggle, learned what materials you need, tackled a basic pattern, and explored ways to make it even more enticing. Stop buying those pricey, easily destroyed toys. Grab your hook and yarn, whip up a few of these curly wonders, and watch your cat pounce, bat, and chase their new favorite plaything. It's a small effort for a big payoff in feline happiness.