Table of Contents
Let's be honest. You've probably shelled out good money for some fancy cat toy shaped like a sparkly fish, only for your feline overlord to ignore it completely and become obsessed with the box it came in. Sound familiar? Cats are simple creatures with complex tastes, and often, the best entertainment comes from the most unexpected places. Before you toss that Amazon delivery box, consider its true potential. That's right, we're talking about the magic ofdiy cat toys cardboard.
Why Bother with DIY Cat Toys Cardboard?
Why Bother with DIY Cat Toys Cardboard?
let's cut to the chase.Why Bother with DIY Cat Toys Cardboard? Because your cat is probably going to prefer it anyway. Seriously. You could buy them a laser pointer, a feather wand, a robotic mouse that cleans your floors while it plays, and they will inevitably find more joy batting a crumpled receipt under the fridge. Cardboard is the unsung hero of feline entertainment. It's everywhere – that box from your latest online shopping spree, the empty paper towel roll, the cereal box you just finished. Instead of tossing it, you have a free, readily available resource that speaks directly to your cat's primal instincts: hiding, scratching, pouncing, and generally causing delightful chaos. Plus, let's talk budget. Those store-bought toys add up fast, and half of them end up ignored. Cardboard is the ultimate zero-cost, high-reward option for keeping your furball entertained without emptying your wallet.
Getting Started: Simple DIY Cat Toys Cardboard Ideas

Getting Started: Simple DIY Cat Toys Cardboard Ideas
The Classic: The Cardboard Box Itself
Alright, let's kick this off with the absolute easiestdiy cat toys cardboardidea. Ready? Get a cardboard box. Any box will do – shoe box, shipping box, cereal box (if your cat is tiny). Put it on the floor. Done. Seriously, that's it. Your cat will instinctively hop in, hide, pounce from it, or just sit there judging you. It's the feline equivalent of a luxury apartment, apparently. Sometimes adding a simple hole on the side turns it into a peek-a-boo game. Don't overthink this first step. Just provide the raw material.
Adding Some Interaction: Holes and Treats
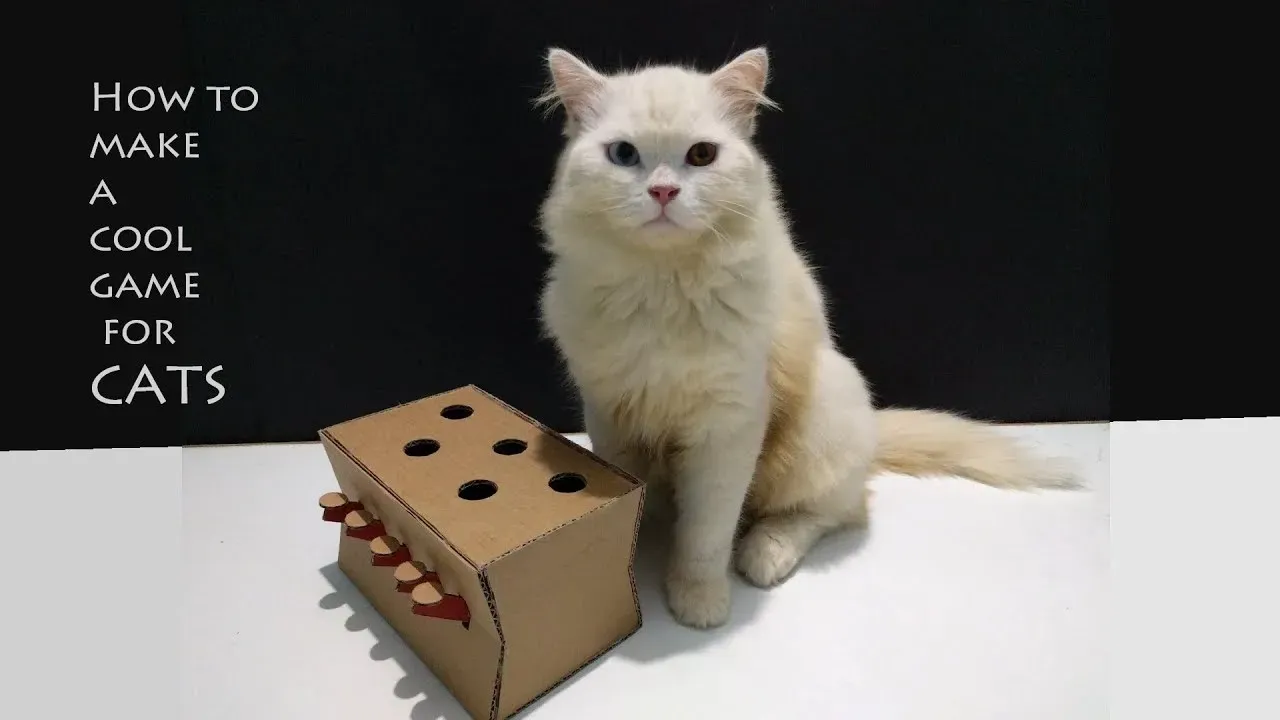
maybe just a box isn't *quite* enough for your discerning furball. Let's level up slightly, still keeping it firmly in the "simple" category ofdiy cat toys cardboard. Grab a box and a pair of scissors or a utility knife (adult supervision required, obviously). Cut a few different sized holes in the sides and top. Make some just big enough for a paw to fit through, others large enough for their head. Toss a few treats or small, noisy toys inside. Now you've created a puzzle box. Your cat has to work to get the goodies out, engaging their natural hunting instincts. It's like dinner and a show, starring your cat's adorable paws.
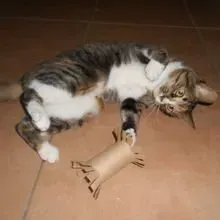
Another ridiculously simple idea? Take an empty paper towel roll. Toss a few dry treats inside and crimp the ends closed. Instant treat dispenser roll. They'll bat it around to get the treats out. Minimal effort, maximum cat engagement (at least until all the treats are gone). Remember, the goal here is quick, effective fun using stuff you already have lying around.
- Simple Box Hideout
- Holey Treat Puzzle Box
- Crimp-End Treat Roll
- Cardboard Tube Batting Toy
Making it Move: Simple Danglers and Rollers
Movement is key to catching a cat's attention. You can easily add motion to yourdiy cat toys cardboardcreations. Cut a long strip of cardboard, maybe an inch wide and a foot or two long. Dangle it from a doorway or off the edge of a table. It flops and sways, irresistible to pouncing paws. Or, take a larger cardboard tube, like from gift wrap, and let it roll around. Your cat will chase it, bat it, and probably try to ambush it from behind the sofa. These require almost no construction but provide dynamic play that mimics prey movement. It's about using the material's properties to your advantage.
Beyond the Basic Box: Creative DIY Cat Toys Cardboard Projects
Beyond the Basic Box: Creative DIY Cat Toys Cardboard Projects
Building a Cardboard Cat Condo or Fort
so the basic box is a hit, but maybe you're feeling ambitious. Maybe you've got a mountain of cardboard piling up from that recent furniture delivery. This is your chance to go big withdiy cat toys cardboard. Think multi-level cat condo or an epic cardboard fort. It's not as hard as it sounds. You just need several boxes of varying sizes and some strong packing tape. Start by taping larger boxes together to form a base. Cut entry and exit holes between them. Stack smaller boxes on top, taping them securely. Cut more holes, maybe add some lookout points or tunnels. The key is stability – make sure it won't collapse when your cat launches themselves at it like a furry missile. This isn't just a toy; it's prime real estate in your living room, a vertical playground that satisfies their urge to climb and survey their domain from on high. Plus, it looks way cooler than a single sad box.
Crafting Cardboard Scratchers and Loungers
Your sofa's worst enemy? Your cat's claws. redirect that destructive energy into adiy cat toys cardboardcreation specifically designed for scratching. You can buy pre-made cardboard scratchers, but making your own is cheaper and lets you customize the size and shape. Get some corrugated cardboard sheets (often found in larger boxes). Cut them into strips of the same width. Stand them on edge and pack them tightly into a shallow box or frame. Glue them together with non-toxic glue or just pack them so tightly they stay put. Once dry, you've got a horizontal scratching surface your cat will hopefully prefer to your upholstery. You can also cut out large, flat shapes and layer them to create a simple, thick scratching pad or even a curved lounge chair shape. It’s about giving them an acceptable outlet for a natural behavior.
Think about the textures your cat loves. Corrugated cardboard provides that satisfying shreddable surface. Combining different cardboard types can add variety. You could even embed some catnip between the layers before gluing.
- Multi-level Cat Condo
- Cardboard Scratching Pad
- Layered Cardboard Scratcher Lounge
- Cardboard Tunnel System
Designing Interactive Cardboard Puzzle Toys
Let's get those little cat brains working.DIY cat toys cardboardcan go beyond physical play and challenge their problem-solving skills. Remember the simple treat box? We can build on that. Take a medium-sized box and cut several holes in the top or sides, just big enough for a paw. Inside, place smaller cardboard tubes or boxes, creating a simple maze or obstacles. Hide treats or toys within the inner structure. Your cat has to figure out how to navigate their paw through the openings and around the obstacles to reach the prize. You can increase the difficulty by adding more layers or smaller, more complex barriers inside. It’s like a treasure hunt, but the treasure is kibble and the hunter has whiskers.
Essential Tools and Materials for DIY Cat Toys Cardboard
Essential Tools and Materials for DIY Cat Toys Cardboard
Alright, so you're ready to dive into the world ofdiy cat toys cardboard. Good choice. The barrier to entry is delightfully low. You don't need a workshop full of power tools or a degree in structural engineering. Most of what you require is probably already lurking in your junk drawer or recycling bin. Cardboard, obviously, is your main ingredient. Get various types – sturdy shipping boxes for structures, thinner cereal boxes for smaller toys, and corrugated sheets for scratching surfaces. Beyond the cardboard itself, you'll need something to cut it. Sharp scissors are fine for thinner stuff, but a utility knife or box cutter makes cleaner cuts on thicker cardboard (handle with care!). You'll also need something to stick things together. Strong packing tape is your best friend for assembling larger structures. Avoid regular clear tape; it won't hold up to determined feline assault. Non-toxic glue, like basic school glue or wood glue labeled non-toxic, is good for laminating layers for scratchers or attaching smaller pieces. A ruler or straight edge helps with getting clean lines if you're feeling precise. And maybe, just maybe, a little catnip never hurt anyone's crafting process (or at least, it distracts the quality control department).
- Various Cardboard Types (Boxes, Tubes, Sheets)
- Sharp Scissors
- Utility Knife or Box Cutter
- Strong Packing Tape
- Non-Toxic Glue
- Ruler or Straight Edge
- Optional: Catnip
Safety First: Tips for Building DIY Cat Toys Cardboard
Safety First: Tips for Building DIY Cat Toys Cardboard
Mind the Edges and Add-ons
So you've got your pile of cardboard and a vision of a multi-story feline play palace. Before you start taping like a maniac, pause and think about safety. Your cat isn't known for delicate handling; they will chew, claw, and potentially try to ingest parts of your creation. This is crucial for anydiy cat toys cardboardproject. Ensure all cut edges are as smooth as possible. Rough or jagged edges can cause scrapes or splinters. Use strong, non-toxic tape to secure all seams and connections. Avoid using staples or small metal fasteners, as these can come loose and be swallowed. If you're adding any extra elements, like string, fabric scraps, or plastic bottle caps for noise, make absolutely sure they are firmly attached and won't become choking hazards. Anything small enough to fit down a cat's throat is a bad idea. Keep it simple and sturdy.
- Smooth out all cut cardboard edges.
- Use only strong, non-toxic tape (like packing tape).
- Avoid staples, nails, or small metal parts.
- Securely attach any added elements (string, fabric, etc.).
- Ensure no small pieces can break off and be swallowed.
Regular Inspection is Key
Building the toy is only half the battle. Just because it looked solid when you finished doesn't mean it will stay that way after a few intense play sessions. Your cat is essentially a furry demolition expert. You need to regularly inspect yourdiy cat toys cardboardcreations for wear and tear. Look for loose tape, frayed edges, or areas where the cardboard is starting to break down. If you used glue, check those seams. Any part that looks like it's about to detach needs immediate repair or the toy needs to be retired. A torn piece of cardboard might seem harmless, but if your cat chews it off and swallows it, you're looking at a potential vet visit. Don't wait for something to fall apart; give it a quick check every few days, especially if it's a favorite spot for intense play. If it looks sketchy, pitch it and build a new one – you've got plenty more cardboard, right?
Check For: | Why It's a Problem: | Action Needed: |
|---|---|---|
Loose Tape | Can be ingested, toy falls apart. | Re-tape or discard. |
Frayed Edges | Splinter risk, tempting to chew off. | Trim smooth or discard. |
Detaching Pieces | Choking hazard. | Repair immediately or discard. |
Excessive Chewing/Shredding | Risk of ingesting cardboard pieces. | Discard or offer a designated scratcher. |
The Cardboard Cat Kingdom: A Final Word
So there you have it. Before you condemn another cardboard box to the recycling bin, remember its potential. Craftingdiy cat toys cardboardisn't about grand gestures or Pinterest perfection; it's about giving your cat something simple, engaging, and frankly, cheap, to interact with. They might ignore your elaborate structure and just chew on a flap, and that's fine. The point is they're getting stimulation from something you already had lying around. It's a low-stakes way to provide enrichment, save a few bucks, and maybe get a chuckle watching your cat lose its mind over a piece of corrugated paper. Give it a shot; the worst that happens is you still have a box to recycle.