Table of Contents
Let's be honest, you buy your cat that fancy, expensive toy shaped like a robotic mouse, and what does Fluffy play with? The cardboard box it came in, naturally. It's a tale as old as time, or at least as old as online shopping. Cats possess an almost mystical connection with simple containers. But why just let them sit in a plain old box when you can transform it into a feline entertainment center? That's where the magic of a homemade cat toys box comes in. Forget shelling out cash for plastic contraptions that will be ignored within a week. We're talking about unlocking serious fun and mental stimulation using materials you likely already have cluttering your house.
Why Cats Are Obsessed with Boxes (And Why DIY Toys Rule)

Why Cats Are Obsessed with Boxes (And Why DIY Toys Rule)
The Cardboard Mystique
It's a scene played out in countless homes daily: a cat bypassing a pile of perfectly good, store-bought toys to cram itself into a box half its size. This isn't just random feline eccentricity; there's something deeply ingrained in their tiny, predatory brains that draws them to these humble cardboard containers. The fascination with a simple homemade cat toys box isn't new, but understanding the 'why' makes creating DIY fun so much more effective. They aren't just boxes; they're forts, hunting blinds, and nap pods all rolled into one.
Instincts and Security
Think about it from a cat's perspective. Boxes offer a sense of security and concealment. In the wild, small, enclosed spaces provide protection from predators and a hidden spot from which to ambush prey. That Amazon box on your floor? To your cat, it's a miniature cave, a safe zone where they can observe the world without being fully exposed. This instinct is hardwired. It's why a laundry basket, a paper bag, or yes, a cardboard box, often trumps the latest interactive gadget designed by humans who clearly don't understand cat psychology.
- Safety First: Enclosed spaces feel secure, reducing anxiety.
- Ambush Points: Boxes are prime real estate for surprise attacks on unsuspecting ankles or toy mice.
- Warmth: Cardboard is an insulator, offering a cozy spot to curl up.
- Novelty: A new box is a new territory to explore and claim.
Beyond the Basic Box
Given this innate love for boxes, leaning into the idea of a homemade cat toys box just makes sense. Why fight evolution? Instead of just providing an empty container, we can enhance it, turning it into a stimulating environment. DIY toys built into or from boxes tap directly into those primal instincts for hiding, pouncing, and exploring. It's about leveraging their natural preferences rather than trying to force them to play by human rules. Plus, let's be honest, it saves you money and gives you something productive to do with all that packaging.
Simple Cardboard Creations: Easy Homemade Cat Toys Box Ideas

Simple Cardboard Creations: Easy Homemade Cat Toys Box Ideas
The Classic Peek-a-Boo Box
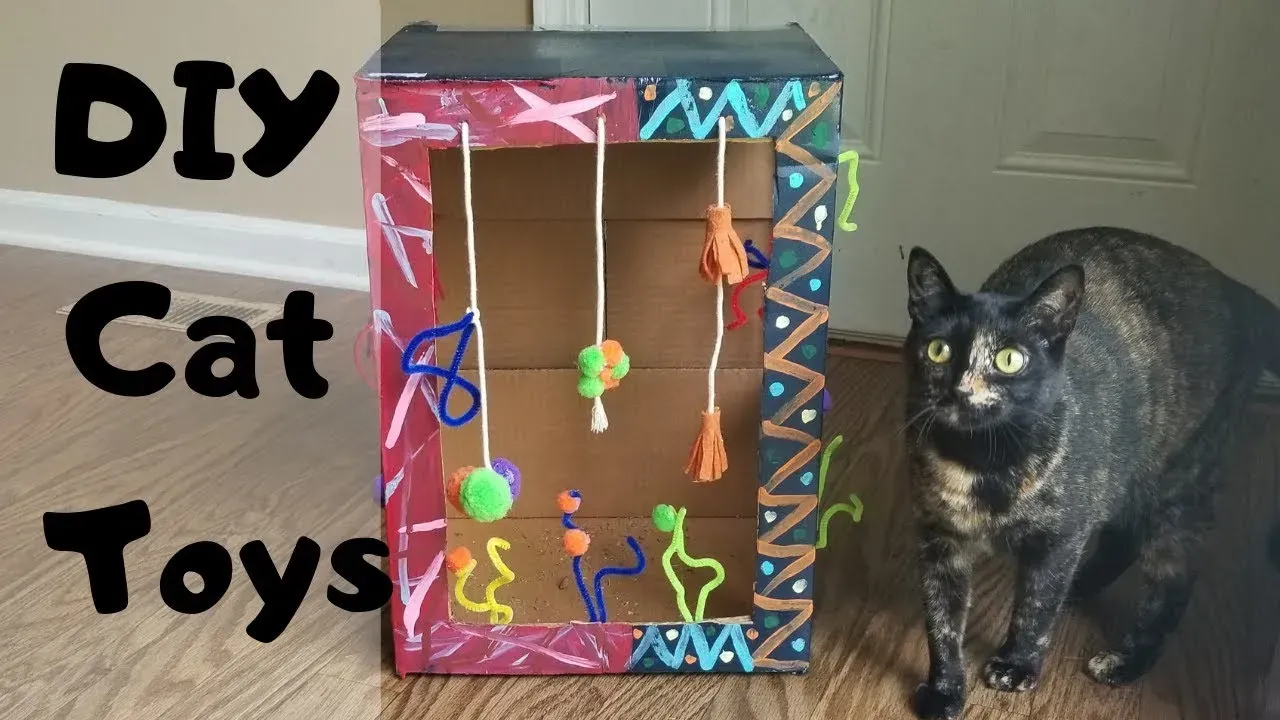
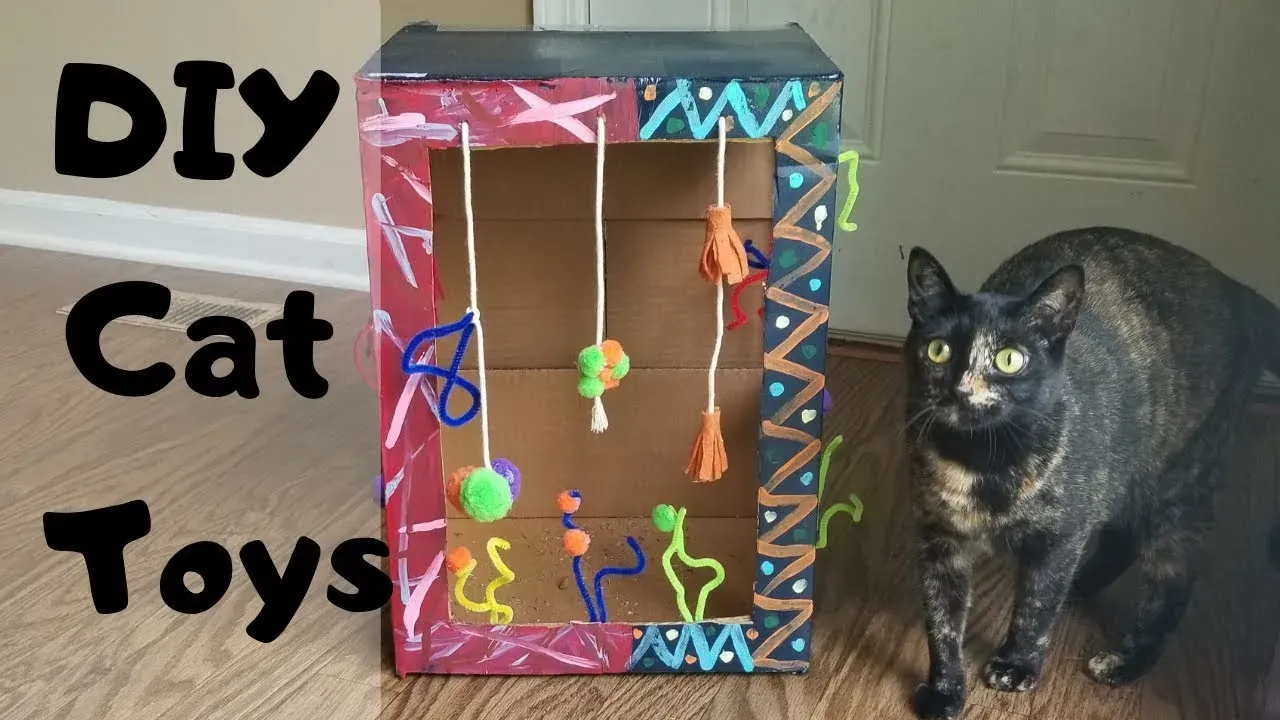
Alright, so you've got this box. Maybe it held new shoes, maybe it delivered that gadget you definitely didn't need but bought anyway. Don't toss it. This is ground zero for a homemade cat toys box masterpiece. The simplest trick in the book? Cut some holes in it. Not just one big hole your cat can waltz through, but smaller ones on the sides and top, just big enough for a paw to fit through. This turns the box into an instant interactive game. Drop a few crinkle balls, some old wine corks, or even just a crumpled paper inside. Your cat gets to practice their hunting skills, batting at the hidden treasures within. It’s ridiculously simple, requires zero special skills, and taps directly into their innate desire to stalk and capture.
The Cardboard Scratch & Hide
Taking that basic box concept a step further involves adding textures and levels. Grab a slightly larger box and maybe a smaller one or some extra cardboard scraps. You can create internal dividers or platforms by cutting and folding extra cardboard. This adds complexity, giving your cat different levels to explore and hide on. For scratching, you don't need fancy sisal. Cut flat pieces of cardboard and glue or tape them securely to the bottom or sides inside the box. Corrugated cardboard is surprisingly satisfying for cats to sink their claws into. It’s not pretty, but your couch will thank you. This layered homemade cat toys box provides both a secure hideaway and a designated scratching zone, hitting two key feline needs with one cardboard stone.
- Cut varied size holes (paw-sized is key).
- Drop in small, intriguing items (balls, corks, paper).
- Add internal cardboard dividers or platforms for levels.
- Glue flat cardboard pieces inside for scratching surfaces.
- Ensure all tape/glue is non-toxic and securely applied.
Level Up Your Homemade Cat Toys Box: Adding Complexity and Enrichment

Level Up Your Homemade Cat Toys Box: Adding Complexity and Enrichment
Building Internal Mazes and Textures
so the basic peek-a-boo box is a good start, a real entry-level project for your feline architect. But what if you want to challenge their brain a bit more? This is where you start thinking about internal structures. Instead of just holes on the outside, build walls and dividers inside the homemade cat toys box. Cut slits in cardboard pieces and slide them together to create a grid or a simple maze. This forces your cat to work harder to reach toys or treats you place inside, adding a layer of problem-solving. You can also introduce different textures within the box – maybe glue a piece of old carpet scrap to one wall, some bubble wrap (supervised play only!), or even just crumpled paper in one section. Variety keeps things interesting and prevents boredom.
- Create internal walls using cardboard scraps slid into slits.
- Build a simple maze structure inside the box.
- Add different textures: carpet squares, bubble wrap, crumpled paper.
- Place treats or favorite toys deep within the maze.
- Encourage exploration by changing the internal layout occasionally.
Adding Puzzle Elements and Treat Dispensers
To truly elevate your homemade cat toys box from a simple hideout to a mental workout, incorporate puzzle elements. This doesn't require a degree in feline engineering. Think simple mechanics. Cut holes in the top or sides just large enough for a treat to fall through when your cat bats at something inside. You can suspend a toy or a small container (like a paper towel roll segment) from the top of the box with string, letting it dangle inside. Cut holes in the dangling piece so treats fall out as your cat interacts with it. This mimics the challenge of extracting prey and provides a rewarding outcome (the treat!). It turns playtime into a rewarding scavenger hunt, which is far more engaging than batting a static object.
You've seen your cat stare intently at a bug under the rug, trying to figure out how to get it. This is the same principle – providing a challenge that requires thought and action to solve.
Connecting Multiple Boxes for a Feline Funhouse
Why stop at one box when you can build a whole complex? Connecting multiple cardboard boxes creates a multi-room structure, a veritable feline funhouse. Cut connecting tunnels between boxes – make some large enough to walk through, others just big enough to squeeze through. Add different features to each box: one could be the "scratch room" with cardboard scratchers, another the "puzzle room" with internal structures and treat dispensers, and another just a dark, empty "hideout." Stack boxes securely to create vertical levels, adding climbing and jumping opportunities. Use strong packing tape to join the boxes firmly. This kind of elaborate homemade cat toys box provides a dynamic environment that caters to all their instincts – exploring, hiding, climbing, and hunting – all within the safe confines of your living room.
Making Them Last: Safety and Durability for Your DIY Cat Toys

Making Them Last: Safety and Durability for Your DIY Cat Toys
Choosing Materials Wisely
Look, we're dealing with cardboard here, not Kevlar. Your homemade cat toys box isn't going to survive an apocalypse, but you can definitely give it a fighting chance. The first step in making these creations last, and more importantly, keeping your cat safe, is being picky about your materials. Not all cardboard is created equal. Avoid boxes that held chemicals, cleaning supplies, or anything else potentially toxic. Stick to clean boxes from food deliveries or electronics. Also, be mindful of tape and glue. Use strong packing tape on the *outside* and ensure edges are taped down neatly so there are no sticky bits for paws or tongues. If you're using glue, opt for non-toxic, pet-safe varieties, and let it dry completely before introducing the box to your cat. Small staples or metal fasteners are a hard no – those are just asking for trouble.
Building for the Beast
Cats are surprisingly effective destroyers when they put their minds to it. They chew, they scratch, they pounce with the force of tiny panthers. So, when you're building your homemade cat toys box, you need to anticipate this. Reinforce edges and corners with extra layers of tape. If you're creating internal structures, make sure they're securely attached and not wobbly. Wobbly bits get ripped off. Cut holes large enough that a cat can't get truly stuck, but small enough to be a challenge. Smooth down any rough edges where you've cut the cardboard. Think about where stress points will be – where they'll jump in, where they'll scratch most. Build those areas tougher. It's less about making it indestructible and more about making it resilient enough for enthusiastic play without immediate disintegration or creating hazards.
- Use strong packing tape on exterior seams and edges.
- Avoid staples, pins, or small metal parts.
- Ensure glue is non-toxic and fully cured.
- Reinforce corners and entry points.
- Smooth down all cut cardboard edges.
- Make holes large enough to prevent a cat getting trapped.
Inspection and Maintenance Routine
Even the most well-built homemade cat toys box won't last forever. This isn't fine furniture; it's disposable entertainment. The key is regular check-ups. Make it a habit to inspect your cat's cardboard creations every few days, especially if they're heavily used. Look for torn edges, loose tape, collapsing sections, or any parts that are coming apart. Is your cat ingesting bits of cardboard? That's a sign it's time for retirement. If a section looks weak, reinforce it with more tape. If it's truly falling apart or becoming a hazard, don't hesitate to dismantle it and start fresh. The beauty of cardboard is that it's cheap and plentiful. Replacing a worn-out box is easier (and safer) than dealing with a vet bill because Mittens swallowed a piece of tape or got stuck in a collapsing tunnel.
The Final Scratch: Making Play Happen
So, there you have it. The humble cardboard box, often destined for recycling, holds the potential for hours of feline amusement. Building a homemade cat toys box isn't about crafting some elaborate monument to your pet's leisure; it's about understanding their simple, instinctual needs for hiding, pouncing, and exploring. You've seen how easy it is to transform everyday items into engaging playthings, saving money and reducing waste along the way. Your cat might still occasionally ignore your masterpiece for a dust bunny under the sofa, that's just how they operate. But providing these opportunities for enrichment is a solid step toward a happier, more stimulated indoor predator. Keep experimenting, keep observing, and remember, sometimes the best toys are the ones you make yourself, even if they do end up shredded.