Table of Contents
Ever dreamt of crafting your own purr-fect feline friend? Learning how to crochet a cat is a delightful way to bring a touch of handmade charm into your life. Forget store-bought plushies; imagine the satisfaction of creating a unique, cuddly companion with your own two hands! This guide will take you on a step-by-step journey, transforming yarn and a hook into an adorable amigurumi cat. Whether you're a seasoned crocheter or a curious beginner, we'll break down the process into manageable chunks, ensuring a fun and rewarding experience. We'll start with gathering all the necessary supplies, from choosing the right yarn colors to selecting the perfect hook size. Then, we'll dive into mastering the basic crochet stitches that form the foundation of your cat. Next, comes the exciting part: following our detailed instructions to bring your crocheted cat to life, stitch by stitch. Finally, we'll explore ways to personalize your creation, adding unique touches that reflect your own style and make your cat truly one-of-a-kind. Get ready to unleash your creativity and crochet a cat that's as special as you are!
Gathering Your Supplies to Crochet a Cat
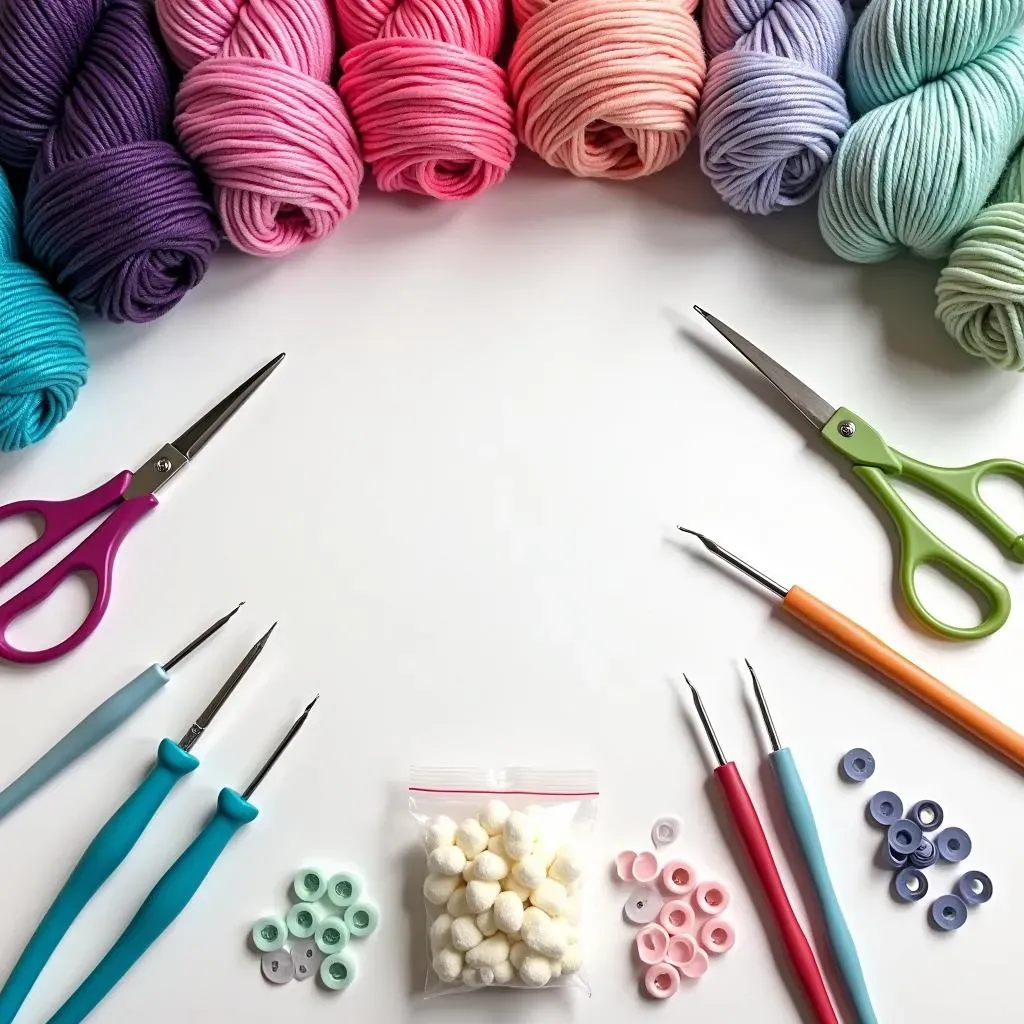
Gathering Your Supplies to Crochet a Cat
Yarn Selection: The Foundation of Your Feline
Choosing the right yarn is crucial for your crocheted cat. Think about the texture you want – soft and cuddly? Or something with a bit more structure? Acrylic yarn is a popular choice for amigurumi because it's affordable, comes in a rainbow of colors, and is easy to care for. Cotton yarn is another great option, offering a more natural feel and a crisp stitch definition. Worsted weight yarn is generally recommended for beginner-friendly projects, but don't be afraid to experiment with different weights to achieve different sizes and textures. And of course, consider the color! Will your cat be a classic tabby, a sleek black panther, or a vibrant calico? The possibilities are endless!
Beyond the basic type and color, think about the yarn's quality. Cheaper yarns might be scratchy or prone to splitting, which can make crocheting frustrating. Investing in a slightly higher-quality yarn can make a big difference in the final result and your overall enjoyment of the project. Also, remember to buy enough yarn to complete your project! Running out mid-way is a real buzzkill. It's always better to have a little extra than to come up short. Speaking from experience, that last-minute yarn run can turn into a wild goose chase!
Hooks, Needles, and Other Essentials
Now that you've got your yarn sorted, let's talk hooks! The size of your crochet hook will depend on the weight of your yarn. The yarn label usually suggests a hook size, but it's always a good idea to do a gauge swatch to see if you're getting the right tension. A hook that's too small will result in a tight, stiff fabric, while a hook that's too large will create a loose, floppy fabric. For worsted weight yarn, a size H/8 (5.0 mm) hook is a good starting point. Invest in a set of hooks in different sizes so you're prepared for any project that comes your way. Ergonomic hooks with comfortable handles can also make a big difference, especially if you're planning on crocheting for extended periods.
Beyond yarn and hooks, you'll need a few other essential tools. A yarn needle (also known as a tapestry needle) is used to weave in the ends of your yarn, creating a clean and professional finish. Scissors are a must for cutting yarn. Stuffing is needed to give your cat its shape – fiberfill is a popular choice. Safety eyes add a touch of realism (but be careful when using them around small children!), or you can embroider the eyes with yarn. Stitch markers are helpful for keeping track of your rounds, especially when working in the round. And finally, a good pair of scissors is essential for snipping yarn ends.
Supply | Purpose | Recommendation |
|---|---|---|
Yarn | The main material for your cat | Acrylic or cotton, worsted weight |
Crochet Hook | To create the stitches | Size H/8 (5.0 mm) for worsted weight yarn |
Yarn Needle | Weaving in loose ends | Metal or plastic with a large eye |
Scissors | Cutting yarn | Sharp and precise |
Stuffing | Giving the cat its shape | Fiberfill |
Mastering Basic Crochet Stitches for Your Cat Project
Mastering Basic Crochet Stitches for Your Cat Project
Before you can bring your crocheted cat to life, you'll need to familiarize yourself with a few essential crochet stitches. Don't worry, they're easier than they look! The magic ring (or adjustable ring) is the foundation of most amigurumi projects, creating a tight, seamless center. The single crochet stitch (sc) is your bread and butter – it's simple, compact, and creates a dense fabric perfect for stuffing. The increase (inc), usually two single crochets in one stitch, adds volume and shapes your cat's body. The decrease (dec), which combines two stitches into one, reduces the number of stitches and creates curves. Slip stitch (sl st) is used to join rounds and create a clean finish. Chain stitch (ch) is used to start rows and create chains.
Practice these stitches until they feel natural. There are tons of free tutorials online, both written and video, so don't hesitate to consult them. Once you've got these basics down, you'll be well on your way to crocheting a cat that's the cat's meow! Remember, everyone starts somewhere. Don't be discouraged if your first few attempts are a bit wonky. Just keep practicing, and you'll be amazed at how quickly you improve.
StepbyStep Guide: Crocheting Your Cat Amigurumi
StepbyStep Guide: Crocheting Your Cat Amigurumi
Starting with the Body
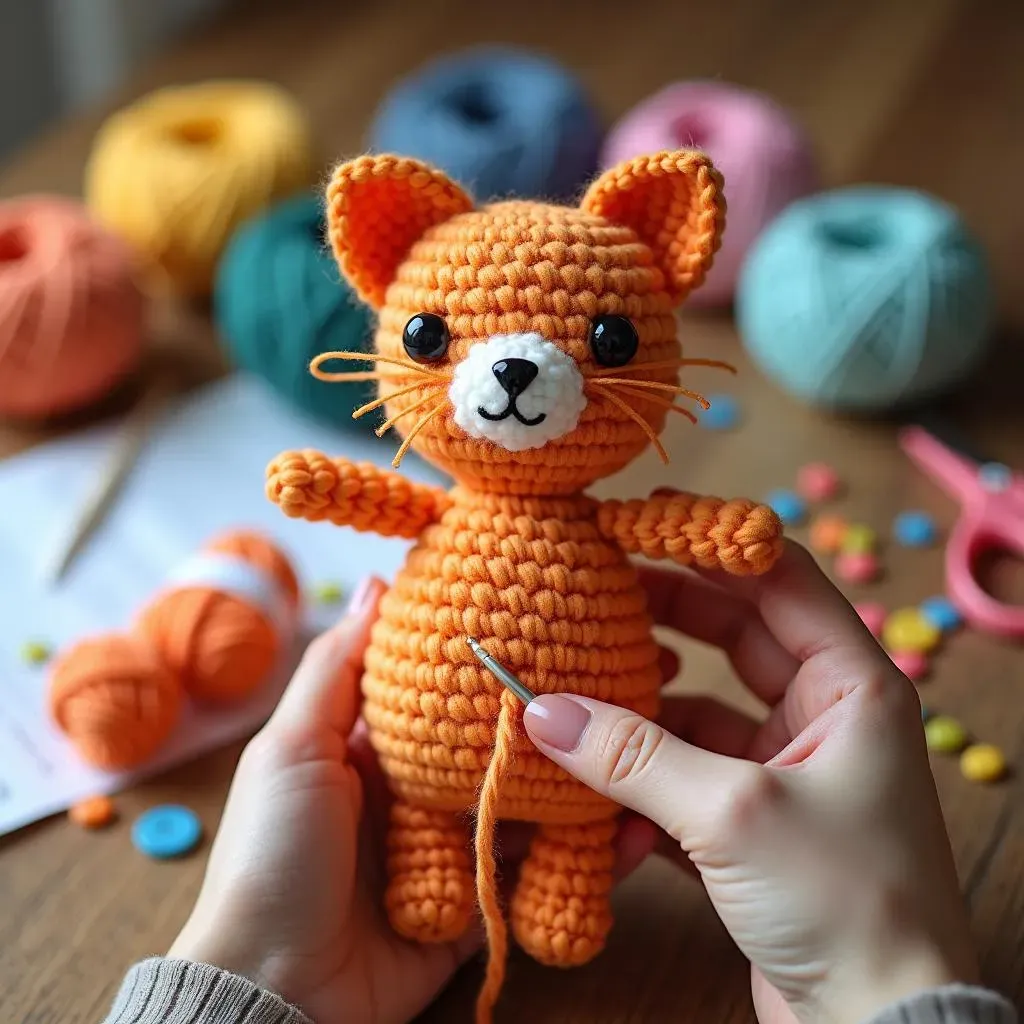
Alright, let's get to the fun part – actually crocheting your cat! We'll start with the body, which is usually worked in the round. Begin with a magic ring (remember that seamless center we talked about?). Then, follow the pattern, increasing in each round to create a rounded shape. The pattern will specify how many stitches to increase in each round to get the right shape. Don't be afraid to use stitch markers to mark the beginning of each round – it's easy to lose track when you're working in a spiral. As you crochet, stuff the body firmly with fiberfill to give it a nice, plump shape. You want it to be firm enough to hold its shape, but not so stuffed that the stitches are stretched out.
When crocheting the body, pay close attention to the tension of your stitches. Consistent tension will result in a smooth, even fabric. If your stitches are too tight, the body will be stiff and misshapen. If your stitches are too loose, the stuffing will show through. Finding the right tension takes practice, so don't get discouraged if it doesn't happen right away. Just keep experimenting until you find what works best for you. Remember, crocheting should be relaxing and enjoyable, so don't put too much pressure on yourself to be perfect!
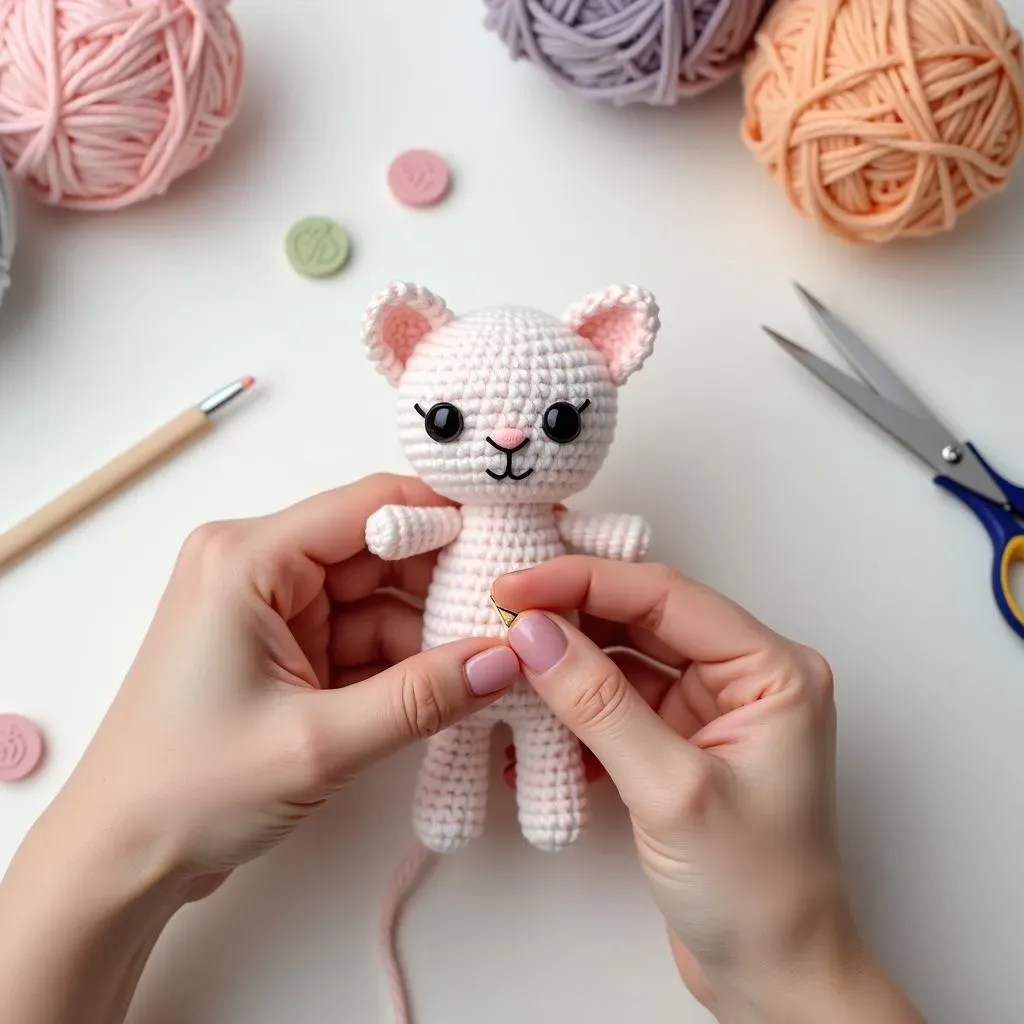
Crafting the Head and Facial Features
Next up is the head, which is crocheted in a similar way to the body. Start with a magic ring and increase in each round to create a rounded shape. The head will typically be slightly smaller than the body. Once you've finished crocheting the head, it's time to add the facial features. This is where you can really let your creativity shine! You can use safety eyes for a classic look, or embroider the eyes with yarn for a softer, more handmade feel. If you're using safety eyes, be sure to attach them securely, especially if the cat is intended for a child. Embroidered eyes are a safer option for young children.
The nose can be embroidered with pink or black yarn, or you can crochet a small triangle and attach it to the face. The mouth can be a simple stitched line or a more elaborate embroidered smile. Whiskers can be added using strands of yarn or embroidery floss. Play around with different placements and expressions until you achieve the look you want. Remember, there's no right or wrong way to create the facial features – it's all about personal preference. A slightly wonky smile or mismatched eyes can add character and charm to your crocheted cat.
Part | Stitches Used | Tips |
|---|---|---|
Body | Magic Ring, Single Crochet, Increase, Decrease | Stuff firmly, maintain consistent tension |
Head | Magic Ring, Single Crochet, Increase, Decrease | Slightly smaller than the body |
Ears | Single Crochet, Increase | Shape them before attaching |
Tail | Chain, Single Crochet | Can be straight or curved |
Assembling Your Feline Friend
Now that you've crocheted all the individual pieces, it's time to assemble your cat! Use a yarn needle to sew the head to the body, making sure to position it securely. The ears are typically attached to the top of the head, and the tail is sewn to the back of the body. Play around with the placement of the ears and tail to achieve different poses and expressions. You can also add other details, such as stripes, spots, or a collar. Get creative and have fun with it!
Once you've sewn everything together, weave in all the loose ends of yarn to create a clean and professional finish. Give your cat a final fluff and admire your handiwork! You've successfully crocheted a cat! Now you can proudly display your creation, give it as a gift, or add it to your growing collection of amigurumi animals. And who knows, maybe you'll even be inspired to crochet a whole clowder of cats!
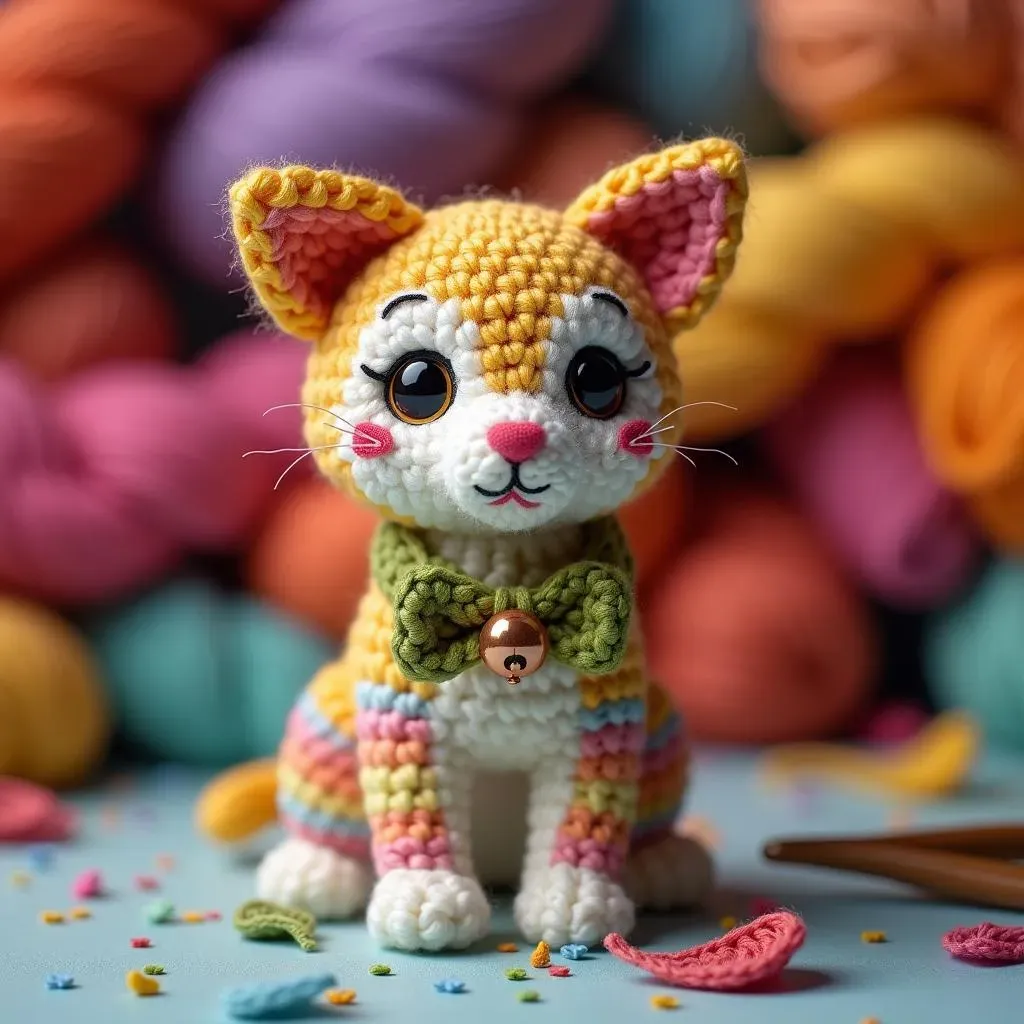
Adding the Purrfect Touches: Customizing Your Crocheted Cat
Adding the Purrfect Touches: Customizing Your Crocheted Cat
Embroidered Details and Appliqués
Want to take your crocheted cat to the next level? Consider adding embroidered details! A few simple stitches can transform a plain kitty into a work of art. Think about adding stripes, spots, or even a cute little heart on its chest. You can use embroidery floss in contrasting colors to make the details really pop. Appliqués are another great way to customize your cat. Crochet small shapes like flowers, stars, or even tiny fish and sew them onto the body. Get creative and let your imagination run wild! Remember, it's all about making your cat unique and special.
Don't be afraid to experiment with different embroidery techniques. Back stitch is great for outlining shapes, while satin stitch can be used to fill in larger areas. French knots are perfect for adding small, textured details. If you're new to embroidery, there are tons of free tutorials online. Practice on a scrap piece of fabric before you start working on your cat. And remember, even small details can make a big difference. A simple embroidered smile or a few strategically placed spots can really bring your cat to life.
Accessorizing Your Crocheted Companion
No cat is complete without accessories! A tiny collar is a classic choice. You can crochet a simple chain and attach a small bell or charm. A little bow tie adds a touch of sophistication. You can even crochet a tiny hat or scarf for your cat to wear. Get creative with your accessories and have fun with it! Think about what kind of personality you want your cat to have and choose accessories that reflect that. A pirate hat for a mischievous cat, a flower crown for a sweet and gentle cat, or a tiny backpack for an adventurous cat. The possibilities are endless!
When choosing accessories, be mindful of safety, especially if the cat is intended for a child. Avoid small parts that could be a choking hazard. Make sure all accessories are securely attached to the cat. You can also use yarn to crochet accessories directly onto the cat, eliminating the need for sewing. A crocheted collar or scarf is a safe and stylish option. And remember, accessories don't have to be complicated. A simple ribbon tied around the neck can be just as effective as a more elaborate creation. The most important thing is to have fun and let your creativity shine!
Accessory | Materials | Tips |
|---|---|---|
Collar | Yarn, bell/charm | Securely attach bell/charm |
Bow Tie | Yarn | Experiment with different colors and patterns |
Hat/Scarf | Yarn | Ensure it fits comfortably |
Stripes/Spots | Yarn | Use contrasting colors for emphasis |
Snuggling Up with Your Handmade Feline: The Joy of Crocheting a Cat
So, you've reached the end of your crocheting journey and now have a charming, handmade cat to show for it! Learning how to crochet a cat is more than just following instructions; it's about embracing creativity, patience, and the joy of crafting something unique. Whether you gift your new feline friend to a loved one or keep it as a cherished memento, remember the skills you've gained and the satisfaction of bringing a simple ball of yarn to life. Don't stop here! Explore different colors, sizes, and embellishments to create an entire clowder of crocheted cats. The possibilities are endless, and the joy of creating is a reward in itself. Happy crocheting!