Table of Contents
Ever dreamt of crafting a feline friend so lifelike, it practically purrs? Learning how to crochet a realistic cat isn't just about yarn and hooks; it's about bringing a touch of artistry and personality to your creations. Forget those generic, flat amigurumi – we're diving deep into the techniques that transform simple stitches into stunningly realistic cats. Whether you're a seasoned crocheter or a curious beginner, this guide will walk you through every step, from selecting the perfect yarn to adding those final, purr-fect details.
Choosing the Right Yarn and Tools to Crochet a Realistic Cat

Choosing the Right Yarn and Tools to Crochet a Realistic Cat
So, you're ready to dive into the world of crocheting realistic cats? Awesome! But before you even pick up a hook, let's talk materials. Choosing the right yarn and tools to crochet a realistic cat is crucial for achieving that lifelike look and feel. Think about it: the yarn is essentially the "fur" of your creation, and the tools are your sculpting instruments. Get these wrong, and you might end up with something closer to a cartoon than a cuddly companion. I remember once, I tried using super bulky yarn for a kitten, and it ended up looking like a linebacker in a fur coat – not exactly the adorable vibe I was going for! So, let's break down the essentials to help you avoid similar mishaps.
Tool/Material | Why It Matters | Recommendations |
|---|---|---|
Yarn | Texture, color, and overall "fur" appearance. | Acrylic, merino wool, or blends in realistic colors. Consider fuzzy or brushed yarns for extra realism. |
Crochet Hook | Affects stitch size and tension. | Smaller hooks (2.0mm - 3.5mm) for tight stitches and a denser fabric. |
Stuffing | Shape and firmness of your cat. | Polyester fiberfill is common, but consider glass beads or plastic pellets for added weight and poseability. |
Eyes | Bring your cat to life! | Safety eyes in realistic colors and sizes. Consider hand-painted or custom eyes for extra detail. |
Mastering Crochet Techniques for a Lifelike Cat: Stitches and Shaping
Mastering Crochet Techniques for a Lifelike Cat: Stitches and Shaping
The Magic of the Single Crochet (and Its Variations)
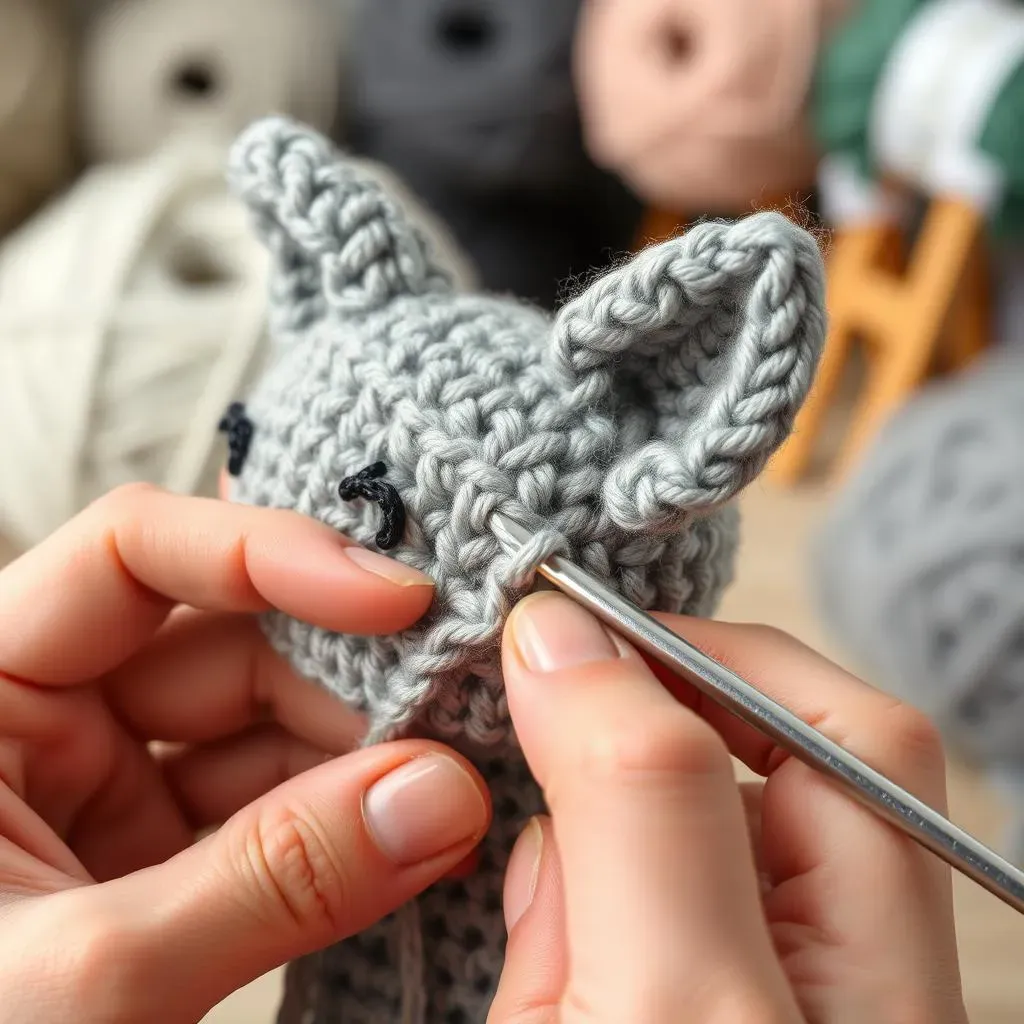
Alright, so you've got your yarn and hook – now it's time to talk stitches! When it comes to mastering crochet techniques for a lifelike cat, the single crochet is your best friend. Seriously, get to know it intimately. It creates a tight, dense fabric that's perfect for holding its shape and preventing stuffing from peeking through. But don't think you're stuck with just the plain old single crochet! Varying your tension can make a huge difference. Tight stitches create a firmer, more defined shape, while looser stitches add a bit of softness and give. Experiment and see what works best for your yarn and desired look. I remember trying to rush a project once, and my tension was all over the place. The cat ended up looking like it had a serious case of the Mondays – all droopy and misshapen!
Another cool trick is using the invisible decrease. This technique helps you reduce stitches without creating those unsightly bumps that can ruin the smooth curves of your cat. Trust me, it's a game-changer! There are tons of tutorials online, so take a few minutes to learn it – you won't regret it.
Shaping Secrets: Increases, Decreases, and Strategic Stitch Placement
Now, let's get to the fun part: shaping! This is where your crochet cat starts to come to life. The key here is understanding how increases and decreases affect the overall form. Increases add volume, while decreases create curves and indentations. Think about where you want your cat to be rounder (like the cheeks or belly) and where you want it to be more defined (like the nose or ears). I find it helpful to look at pictures of real cats and study their anatomy. Notice how the curves flow and where the shadows fall. This will give you a better sense of where to place your increases and decreases.
Don't be afraid to experiment! Crochet is very forgiving – you can always frog (rip out) your work and try again. That's how I learned to get those perfect ear shapes and the subtle curve of the spine. It's all about trial and error, and a healthy dose of patience. Also, stitch placement is also key. For example, using front loop only (FLO) or back loop only (BLO) stitches can create subtle ridges and textures that add to the realism. Try using BLO to define the base of the tail or FLO to create a subtle indentation for the eyes.
Technique | Effect | Best Used For |
|---|---|---|
Increases | Adds Volume | Cheeks, belly, round parts of the head |
Decreases | Creates Curves | Nose, ears, shaping the body |
Front Loop Only (FLO) | Subtle Ridges | Defining facial features |
Back Loop Only (BLO) | Textural Detail | Base of the tail, spine |
Bringing It All Together: Practice Makes Purr-fect
Mastering crochet techniques for a lifelike cat takes time and practice. Don't get discouraged if your first few attempts don't look exactly like the picture. Every crocheter has been there! The more you practice, the better you'll become at reading patterns, understanding stitch tension, and shaping your creations. Try starting with a simpler pattern and gradually work your way up to more complex designs. There are tons of free patterns online, so you can experiment without breaking the bank.
Also, don't be afraid to put your own spin on things! Crochet is a creative outlet, so let your imagination run wild. Maybe you want to add stripes, spots, or even a little collar to your cat. The possibilities are endless! Remember, the most important thing is to have fun and enjoy the process. After all, you're creating a unique, handmade treasure that you can cherish for years to come. So, grab your hook, take a deep breath, and start crocheting! You'll be amazed at what you can create.
Bringing Your Crochet Cat to Life: Adding Details and Finishing Touches
Bringing Your Crochet Cat to Life: Adding Details and Finishing Touches
Eyes are the Window to the (Crochet) Soul
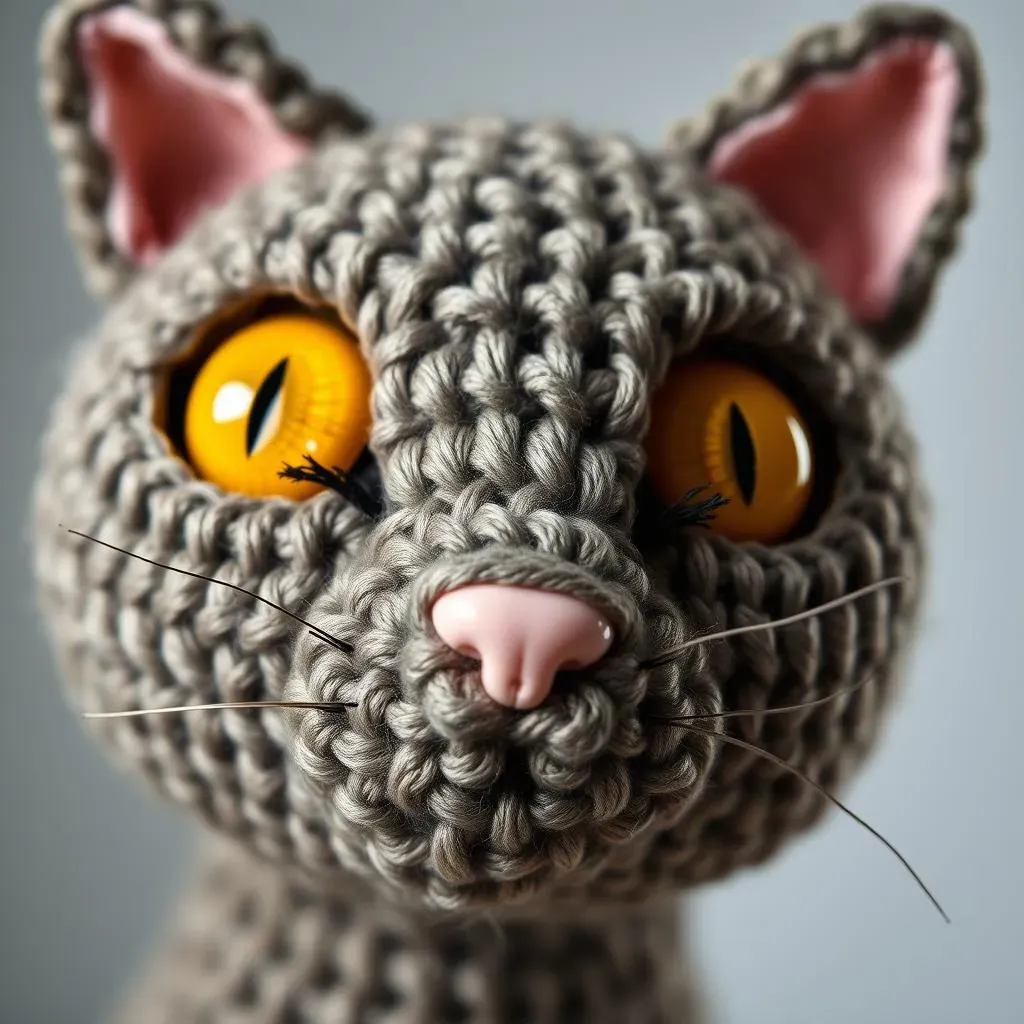
you've got the basic shape down, but now it's time to inject some serious personality! When it comes to bringing your crochet cat to life, the eyes are absolutely critical. They're the focal point, the thing that draws you in and makes you connect with your creation. Don't just slap on any old safety eyes and call it a day! Think about the color, size, and placement. Realistic cat eyes come in a range of colors, from golden yellows to vibrant greens and deep blues. Choose a color that complements your yarn and gives your cat the expression you're going for. I once used mismatched eyes on a whim, and it gave my cat a quirky, slightly cross-eyed look that was surprisingly endearing!
Placement is also key. Too far apart, and your cat will look derpy. Too close together, and it'll look perpetually angry. Experiment with different positions until you find that sweet spot. And don't be afraid to get creative! You can add eyelids using embroidery floss or felt, or even paint the eyes for extra detail. I've seen some amazing crochet artists create incredibly realistic eyes using polymer clay or resin – the possibilities are endless!
Eye Detail | Impact | Tips |
|---|---|---|
Color | Sets the mood and realism | Match to breed or desired expression |
Size | Affects cuteness or realism | Proportionate to head size |
Placement | Determines expression | Experiment for best results |
Eyelids | Adds depth and realism | Use embroidery floss or felt |
Whiskers, Noses, and Other Finishing Touches
Alright, you've got the eyes sorted, but don't stop there! The little details are what truly elevate your crochet cat from cute to realistic. Think about adding whiskers – they're essential for that feline charm. You can use fishing line, yarn, or even horsehair for a more authentic look. Just make sure they're securely attached! I learned that the hard way when my cat's whiskers kept falling out and getting stuck to everything.
The nose is another important feature. You can crochet a small triangle or oval and sew it on, or you can embroider the nose directly onto the face. Consider using a slightly darker shade of yarn to add dimension. And don't forget the ears! Shape them carefully and attach them securely to the head. You can even add a little bit of pink felt to the inside of the ears for extra realism. Finally, consider adding some subtle shading using yarn or fabric markers. This can help to define the features and add depth to your creation.
- Whiskers: Use fishing line, yarn, or horsehair.
- Nose: Crochet or embroider, add shading.
- Ears: Shape carefully, add pink felt inside.
- Shading: Use yarn or fabric markers for depth.
Advanced Tips for Crocheting a Realistic Cat: Patterns and Customization
Advanced Tips for Crocheting a Realistic Cat: Patterns and Customization
Beyond the Basics: Leveling Up Your Crochet Cat Game
So, you've nailed the basics and you're itching for a challenge? Excellent! This is where things get really exciting. Advanced tips for crocheting a realistic cat are all about pushing your skills, experimenting with new techniques, and truly making your creation your own. Forget sticking to simple patterns – we're talking about customizing designs, creating unique fur textures, and adding those extra-special details that will make your crochet cat stand out from the crowd. I remember when I first started experimenting with customization, I was terrified of messing things up. But then I realized that the beauty of crochet is that you can always unravel and try again! That's how I discovered some of my favorite techniques, like using different yarn weights to create realistic fur patterns.
Let's start by talking about patterns. There are tons of amazing crochet cat patterns out there, but don't be afraid to modify them to suit your vision. Maybe you want to change the pose, add different markings, or even create a completely new breed of cat. The possibilities are endless! And if you're feeling really ambitious, you can even try designing your own pattern from scratch. It might seem daunting at first, but with a little practice and some graph paper, you can create a truly unique and personalized crochet cat.
Fur Real: Creating Realistic Textures and Patterns
One of the biggest challenges in crocheting a realistic cat is creating a believable fur texture. There are several techniques you can use to achieve this, from using different yarn weights and textures to incorporating special stitches. For example, you can use a fuzzy or brushed yarn to create a soft, fluffy coat. Or you can use a loop stitch to create a more textured, almost shaggy look. I've even seen some crocheters use a technique called "needle felting" to add extra fur details to their cats. It's a bit time-consuming, but the results can be stunning!
Another cool trick is to use different colors of yarn to create realistic markings. For example, you can use a darker shade of yarn to add stripes or spots to your cat. Or you can use a lighter shade to create highlights and shadows. The key is to blend the colors seamlessly so that they look natural. Experiment with different techniques and see what works best for you. And don't be afraid to get messy! Sometimes the most realistic fur textures are created by accident.
Technique | Effect | Yarn Recommendation |
|---|---|---|
Fuzzy Yarn | Soft, fluffy fur | Lion Brand Go For Faux |
Loop Stitch | Textured, shaggy fur | Any yarn, adjust loop length |
Needle Felting | Detailed fur accents | Wool roving |
Color Blending | Realistic markings | Various shades of similar yarn |
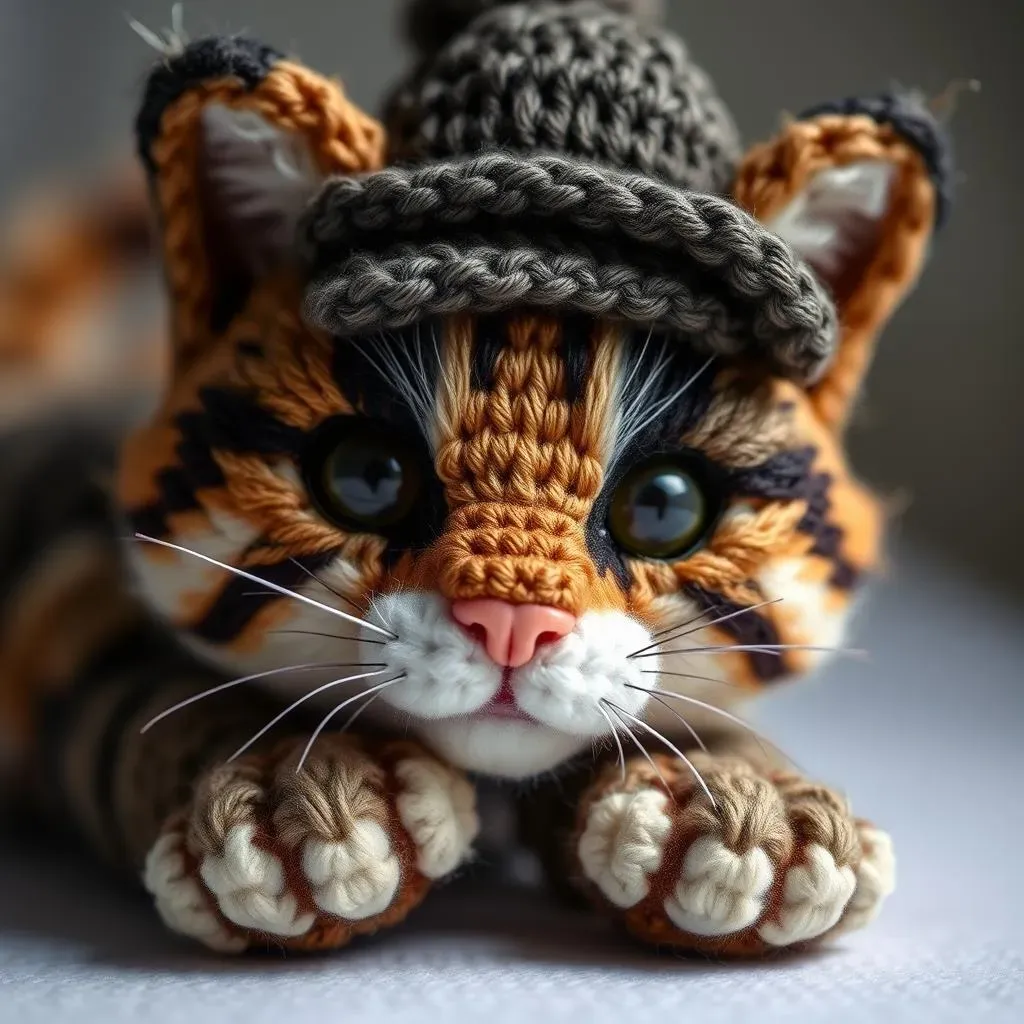
Customization Station: Adding Unique Details and Accessories
so you've got the fur down, but what about those extra-special details that make your crochet cat truly unique? Think about adding accessories like collars, bows, or even tiny hats. You can crochet these accessories using scraps of yarn or felt, or you can buy them pre-made. I once crocheted a tiny Sherlock Holmes hat for my cat, and it was the cutest thing ever! Also, don't forget about those little details like paw pads, claws, and ear tufts. These might seem insignificant, but they can make a huge difference in the overall realism of your creation.
And finally, don't be afraid to get creative with your finishing touches. You can add embroidery details, paint the eyes, or even use wire to make the tail poseable. The possibilities are endless! Remember, the goal is to create a crochet cat that's as unique and special as the real thing. So, let your imagination run wild and have fun with it!
- Collars/Bows: Add personality with yarn or felt.
- Paw Pads/Claws: Crochet or felt for realism.
- Ear Tufts: Add small yarn details.
- Poseable Tail: Use wire for flexibility.
The Joy of Crocheting Your Realistic Feline Friend
So, you've reached the end of our crochet adventure, and hopefully, you're now the proud creator of a stunningly realistic cat. Remember, the journey of learning how to crochet a realistic cat is all about patience, practice, and a touch of creative flair. Don't be afraid to experiment with different yarns, colors, and techniques to make your feline friend truly unique. Whether you gift it to a loved one or keep it as a cherished creation, your crochet cat is a testament to your skills and a heartwarming reminder of the joy of crafting. Happy crocheting!