Table of Contents
Cats, those enigmatic furballs, often display a baffling preference for random household objects over expensive store-bought toys. They'll stalk a sunbeam for hours but yawn at a laser pointer. It makes you wonder what goes on in their tiny, furry heads. Maybe the key is novelty? Or perhaps just something utterly ridiculous.
Why Your Cat Needs a Crochet Toy (and this one's a hoot)

Why Your Cat Needs a Crochet Toy (and this one's a hoot)
Beyond the Basic Catnip Mouse
Let's be real, most cat toys are... fine. They jingle, they crinkle, they get lost under the sofa five minutes after you buy them. But a handmade crochet toy? That's different. There's something about the texture of the yarn, the slight give when they sink their claws into it, that seems to hit different for a lot of cats. Plus, you know exactly what's in it – hopefully just yarn and stuffing, none of those mystery plastics or questionable dyes.
Making a toy yourself means you can choose materials like cotton or bamboo yarn, which some folks feel are safer than acrylic if your cat is a vigorous chewer. It's not just about safety, though. Cats are sensory creatures. They bat, they bite, they bunny-kick. A crochet toy offers a unique tactile experience that a smooth plastic ball just can't replicate.
The Sheer Absurdity of It All
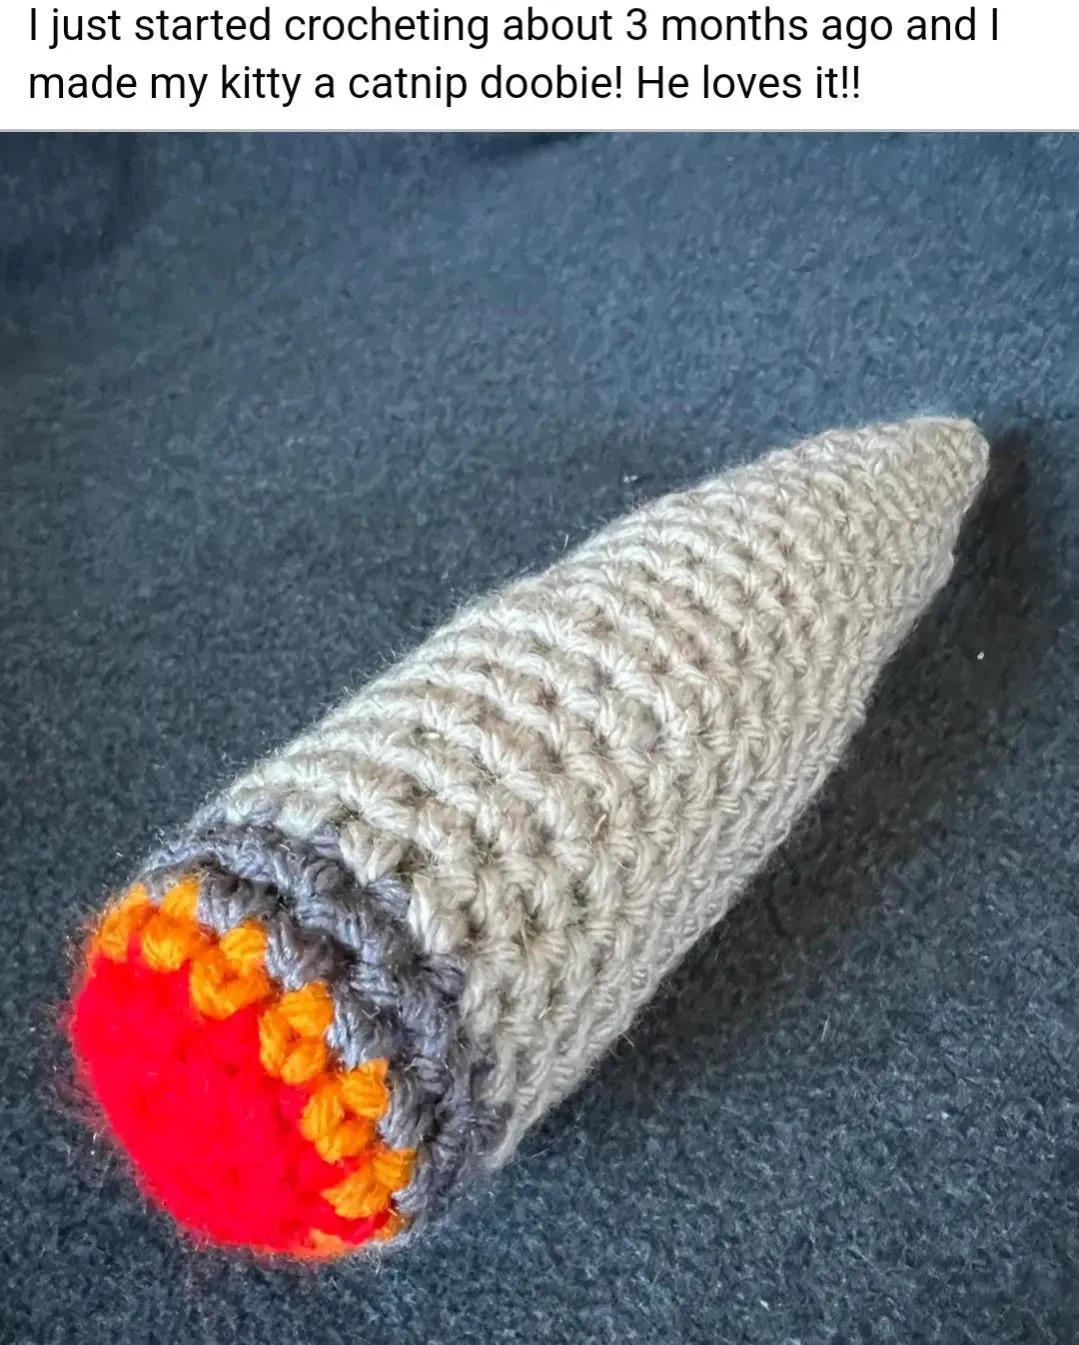
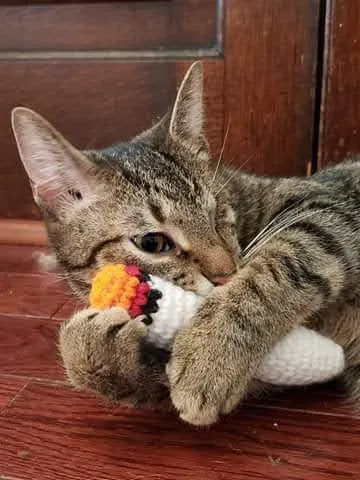
Now, about this particular pattern. Yes, it looks like a joint. No, your cat won't be getting high (unless you add catnip, which is a whole other kind of high, but that's on you). The humor of a tiny, furry creature batting around a crochet facsimile of a cigarette is, frankly, hilarious. And sometimes, that novelty is exactly what snaps a bored cat out of their nap-induced stupor.
Cats are unpredictable. One day they're obsessed with a dust bunny, the next they're ignoring the fancy feather wand you just bought. Offering them something completely out of the ordinary, something that looks a bit silly from a human perspective, might just pique their interest. It's the element of surprise, the "what is this weird thing?" factor, that makes this specific toy a potential winner in the unpredictable game of feline amusement.
- Handmade toys offer unique textures cats enjoy.
- You control the materials used (hello, cotton!).
- They satisfy natural hunting and biting instincts.
- The novelty factor can engage picky cats.
- Making it yourself adds a personal touch.
Gathering Your Supplies for the Joint Cat Toy Crochet Pattern

Gathering Your Supplies for the Joint Cat Toy Crochet Pattern
Picking Your Yarn and Hook
Alright, so you're ready to dive into this slightly questionable but potentially brilliant `joint cat toy crochet pattern`. First things first, you need the right materials. Don't just grab any old yarn out of the stash. Since this is going to be chewed, batted, and potentially slobbered on, opt for something sturdy and washable. Cotton yarn is a solid choice here; it holds up well and doesn't shed microplastics like acrylic can. Look for DK weight yarn – that's 'double knitting' if you're not familiar – it's a nice middle-of-the-road thickness that works well for small toys.
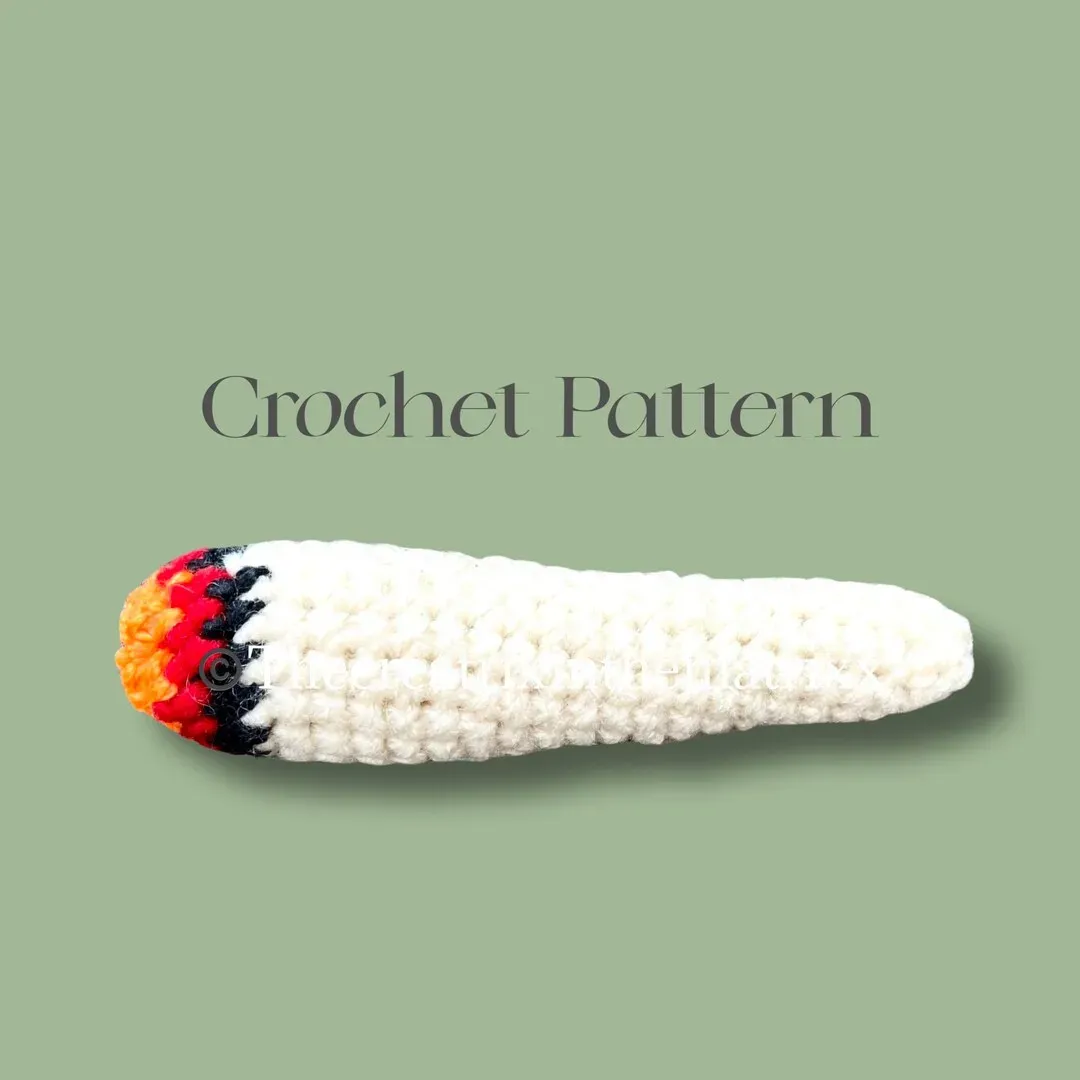
You'll need a few specific colors to get the look right. Think white or off-white for the main 'cigarette' body, a little bit of red or orange for the 'burning' tip, and maybe a tiny bit of black for a detail line if you're feeling fancy. As for the hook, a 2.5mm or 3mm hook usually pairs well with DK weight yarn for a tight fabric that won't let stuffing escape easily. Check your yarn label, but aiming for a hook that creates a firm, not floppy, fabric is key.
Stuffing, Needles, and the Good Stuff (Catnip)
Beyond the yarn and hook, you'll need a few standard crochet notions. A darning needle (tapestry needle) is crucial for weaving in ends and sewing the pieces together neatly. Sharp scissors are non-negotiable unless you enjoy wrestling with fuzzy yarn ends. You'll also need stuffing – standard polyester fiberfill works just fine. Don't overstuff it; you want it firm enough to hold its shape but still squishy enough for a cat to enjoy sinking their teeth into.
Now, for the optional but highly recommended ingredient: catnip. If your cat responds to it, a pinch or two inside the stuffing can turn this novelty toy into an absolute obsession. Just make sure you're using good quality, potent catnip. Old, stale stuff is just dusty green disappointment. Some people mix it right into the fiberfill as they stuff, others put it in a little fabric pouch inside. Find what works for you, and more importantly, what drives your cat wild.
- DK weight yarn (cotton or bamboo recommended) in white/off-white, red/orange, and optional black.
- 2.5mm or 3mm crochet hook.
- Darning needle.
- Sharp scissors.
- Polyester fiberfill stuffing.
- Optional: Fresh, potent catnip.
Mastering the Joint Cat Toy Crochet Pattern: StepbyStep

Mastering the Joint Cat Toy Crochet Pattern: StepbyStep
Getting Started: The Magic Circle and First Rounds
let's get down to the actual crocheting for this `joint cat toy crochet pattern`. Most small amigurumi-style toys start with a magic circle, and this one is no different. It's a technique that creates a tight, closed center, which is exactly what you want so stuffing doesn't poke out. If magic circles feel like some kind of dark art, don't sweat it. There are tons of quick video tutorials online; watch one, practice a couple times, and you'll get it. You'll make a few single crochet stitches into the circle (the pattern will specify how many, usually 6), then pull the tail tight to close it.
After that initial circle, you'll typically work rounds of single crochet, increasing stitches in the first few rounds to create the basic tube shape. This pattern starts with the 'burning' tip color (red or orange). You'll work a couple of rounds with increases, then switch to the main body color (white or off-white). Don't forget to use a stitch marker! Seriously, trying to keep track of rounds without one in continuous spirals is a recipe for frustration and wonky shapes. Just clip it onto the first stitch of each round.
Working the Body and Starting the Stuffing
Once you've got the base shape and switched to your main color, you'll work many rounds without any increases or decreases. This is the straightforward part, just single crochet in each stitch around and around. This creates the long, cylindrical body of the 'cigarette'. The pattern will tell you how many rounds to work, but you can always make it longer or shorter depending on your preference – maybe your cat prefers a king-size.
After you've worked a good portion of the body rounds, it's time to start stuffing. Don't wait until the very end to stuff a long tube; it becomes a real pain to get the stuffing down evenly. Start adding fiberfill when the tube is maybe a third or halfway done. Use a small dowel or the back of your crochet hook to push the stuffing down firmly, especially into the tip. Remember, you want it firm, not rock hard, and definitely not lumpy. If you're adding catnip, this is a good time to sprinkle some in or tuck in your catnip pouch.
- Start with a magic circle for a tight center.
- Use a stitch marker to track rounds in continuous spirals.
- Switch colors according to the pattern for the 'tip' and 'body'.
- Work straight rounds for the main cylinder shape.
- Begin stuffing the toy partway through working the body rounds.
- Stuff firmly but evenly, avoiding lumps.
Stuffing and Finishing Your Crochet Cat Toy Joint

Stuffing and Finishing Your Crochet Cat Toy Joint
Getting That Perfect Density (and Adding the Goodies)
you've crocheted your tube, and it's starting to look suspiciously like the intended object. Now comes the critical phase: stuffing and finishing your `joint cat toy crochet pattern`. Don't just shove a handful of polyfill in there and call it a day. The way you stuff this thing matters. You want it firm enough to hold its shape, but with enough give that a cat can get their teeth and claws into it. I usually stuff as I go, adding small handfuls every few rounds once the tube gets long enough. Use the back of your hook or a chopstick to push the stuffing down evenly, making sure the tip is packed nicely so it doesn't get floppy.
If you're using catnip – and let's be honest, why wouldn't you, unless your cat is one of the unfortunate few immune to its charms? – this is the prime time to add it. You can mix it directly into the fiberfill, or for less mess and potentially longer lasting scent, put it in a tiny sachet or piece of fabric inside the toy before adding the rest of the stuffing. Just a pinch is often enough. Don't go overboard; you're making a toy, not a feline narcotic delivery system.
Closing Up Shop and Hiding Those Tails
Once you've stuffed the main body to your desired firmness, it's time to close the open end. The pattern will likely have you decrease stitches over the final few rounds until you have a small hole left. Cut your yarn, leaving a tail long enough to work with (at least 6-8 inches). Thread this tail onto your darning needle. Now, you'll weave the needle through the front loop of each remaining stitch around the opening, then pull it tight like a drawstring. This cinches the hole shut neatly.
Don't just snip the yarn tail right there. Weave it back through the toy's stuffing a few times in different directions. This anchors the yarn and prevents the end from working its way out with vigorous play. Give the toy a good squish and shape it. Ensure all yarn ends are securely woven in; loose ends are a choking hazard. Your `joint cat toy crochet pattern` is almost ready for inspection by its discerning, four-legged overlord.
- Stuff firmly and evenly using small amounts of fiberfill.
- Use a tool (hook end, chopstick) to push stuffing down.
- Add catnip during stuffing, either mixed in or in a sachet.
- Decrease stitches at the end to close the opening.
- Use a darning needle to cinch the final hole shut.
- Weave in yarn ends securely through the stuffing to hide and anchor them.
Making Your Joint Cat Toy Crochet Pattern Purrfect (Variations & Tips)

Making Your Joint Cat Toy Crochet Pattern Purrfect (Variations & Tips)
Switching Up Materials and Sizes
So you've tackled the basic `joint cat toy crochet pattern` and maybe even made a few. But what if your cat is a giant Maine Coon who sees the standard size as a mere snack? Or perhaps they have opinions about yarn texture (some cats are divas, it happens). This pattern is incredibly forgiving when it comes to modifications. You can easily size it up by using a thicker yarn, like worsted weight, and a correspondingly larger hook (try a 3.5mm or 4mm). This results in a chunkier toy better suited for bigger paws and stronger jaws.
Conversely, for a tiny kitten or a cat who prefers smaller prey, you could drop down to a finer yarn like fingering weight and a smaller hook (around 2mm). Just be aware that working with thinner yarn takes longer and requires a bit more patience. Don't feel strictly bound by the suggested yarn fiber either. While cotton is recommended for durability and safety, some cats go absolutely bonkers for wool (lanolin, maybe?). Just ensure any wool is superwash and tightly spun to reduce shedding.
Durability and Adding Extra Zing
Let's face it, cats can be brutal toy testers. If your feline destroyer tends to shred their playthings within minutes, there are a few tricks to beef up your `joint cat toy crochet pattern`. Crocheting with a tighter tension is key – you want a firm fabric with no gaps. Using a slightly smaller hook than the yarn recommends can help achieve this. Reinforcing the seam where you close the toy is also a good idea; stitch it shut firmly and weave in those ends like your life depends on it.
Beyond durability, think about adding extra sensory appeal. Some people like to add a rattle or a crinkle material inside the stuffing (pieces of a clean plastic bag or crinkle paper work). Just make sure whatever you add is securely encased within the stuffing and crochet fabric. And for the love of all that is holy, use fresh catnip if you're using it. Stale catnip is like serving decaf to a coffee snob – utterly pointless and slightly insulting.
- Adjust size with different yarn weights and hook sizes.
- Use tighter tension for a more durable toy.
- Reinforce the closing seam.
- Weave in all ends meticulously.
- Consider adding rattles or crinkle material for extra sound.
- Always use fresh, potent catnip if adding.
Your Cat's New Favorite Vice (Probably)
So there you have it. You’ve navigated the slightly absurd world of the joint cat toy crochet pattern and emerged victorious, or at least with a finished object. Whether your cat immediately takes to batting it around, attempting to 'smoke' it, or simply gives it a disdainful sniff before walking away (because, cats), you've created something unique. It’s a conversation starter, a test of your crochet skills, and maybe, just maybe, the one toy your cat won't immediately lose under the sofa. Enjoy the peculiar satisfaction of crafting this questionable item and watching your furry friend interact with it.